Phug
Phug (unified pug engine for Pug-php and Tale-pug)
Latest Stable Version | Build status
![]()
Overview
What is Phug?
Phug is the pug template engine for PHP.
Phug offers you a clean way to write your templates (such as HTML pages).
Example:
body
  h1 Phug
Instead of writing verbose tags syntax, Phug is based on the indentation
(like Python, CoffeeScript or Stylus).
Here <h1> is inside <body> because h1 has one more indent level. Try
to remove the spaces, you will see <h1> becoming a sibling of <body>
instead of a child. You can indent with any tabs or spaces you want, Phug
will always try to guess the structure by detecting indent level. However
we recommend you to have consistent indentation in you files.
As a template engine, Phug also provide an optimized way to handle dynamic values.
Example:
- $var = true
if $var
  p Displayed only if $var is true
else
  p Fallback
Try to set $var to false to see how the template react to it.
Variables can be set outside of your template (for example in a controller):
label Username
input(value=$userName)
[
  'userName' => 'Bob',
]
Phug is written in PHP, so by default, expressions are written in PHP, but you can plug modules such as js-phpize or wrapper like pug-php that enable this module by default to get js expressions working in your templates. See the comparison below:
Phug:
p=$arr['obj']->a . $arr['obj']->b
[
  'arr' => [
    'obj' => (object) [
      'a' => 'A',
      'b' => 'B',
    ],
  ],
]
Pug-php:
p=arr.obj.a + arr.obj.b
[
  'arr' => [
    'obj' => (object) [
      'a' => 'A',
      'b' => 'B',
    ],
  ],
]
Now you know what Phug is you can:
- see how to install it in the next chapter
- check the original JS project
- see all the language features
If you are not sure you should use Phug or not, please check our Why section below:
Why Phug?
HTML is born in 1989 in the CERN, and was sufficient for its purpose: write pages with titles and links. Nowadays, we build user interfaces for various devices and the final HTML to send to the browser can be very verbose. And even if we must send HTML to the browser, we can use an other cleaner language and compile it.
A lot of template engines just allow to insert dynamic elements inside HTML, with an engine like Phug, you will no longer write HTML at all and will benefit many features: layouts, mixins, conditions, iterations, etc.
Note that Phug supports several versions and doctypes of HTML but also XML, and you can easily create any format you would need; as you can customize expressions handling, etc. Phug has much options and extension possibilities, very much.
Why a template engine?
Most PHP frameworks have a templates system. It's an efficient way to separate the view layer. Delegate view responsibility to template engine is a best practice since it avoids mixing logic (calculation, retrieving and parsing data) with presentation (display, formatting) and it will help you to respect the PSR (principal of single responsibility, that aims to not giving an entity multiple responsibilities), so you will be able to organize your views into pages and visual components with no constraint from your PHP code.
Finally, if you respect this principle (by avoiding, among others, inserting treatments in your templates), then your templates will not contain complex code but only variable inserts. This make this code easy to modify for someone who don't know your application back-end and even neither the PHP language.
Why not to use pugjs?
Isn't it possible to use the JavaScript pug package in a PHP application? Yes it is. There are even many ways to achieve this goal. See the alternatives section for more details. But know this approach has limits. Most important is the data flattening. Any class instance become a flat object when passed through pugjs, it means the object will lost its methods.
Here is a example of what's working well with Phug but would not be possible with pugjs if called via a proxy or a command:
p=today.format('d/m/Y H:i')
[
  'today' => new DateTime('now'),
]
Why upgrade/migrate to Phug?
You may use already a PHP library supporting Pug syntax.
First of all, if you do not use composer, I only can encourage you to switch to this dependencies management system. It's the most used in the PHP ecosystem and it will help you keeping your dependencies up to date. So I invite you to to pick a library among available ones in composer (see https://packagist.org/), prefer most starred ones with regular and recent releases.
Then know that if you use a project containing "jade" in its name, it's probably obsolete as jade is the old name of pug, for example packages kylekatarnls/jade-php, ronan-gloo/jadephp, opendena/jade.php, jumplink/jade.php, dz0ny/jade.php and everzet/jade are all no longer maintained projects that fork the same origin, they are not pugjs 2 compliant and miss a lot of pug features. The most up-to-date project that replace them all is pug-php/pug. In its version 2 it still use the same original engine. Same goes for talesoft/tale-jade replaced with talesoft/tale-pug and its version 2 will also use Phug.
talesoft/tale-pug and pug-php/pug are the most used Pug ports and are actively maintained. By using the last version of these projects, you will therefore automatically migrate to the Phug engine and as contributors of these both projects are now gather in the Phug project and will develop Phug in priority, you will benefit from the best possible support.
To upgrade pug-php/pug and benefit all the features described in this documentation, run the following command in your project:
composer require pug-php/pug:"^3.0"
To be informed about talesoft/tale-pug version 2 release, you can use https://www.versioneye.com/ and add talesoft/tale-pug to your watchlist.
At least, we can assure you Phug surpass others existing implementations on many subjects:
- Extensibility, customization, formats, options
- Integration and easy install in different frameworks
- Documentation
- Live test tool
- Expression handling (js-phpize or any custom language)
- Assets handling and minification (pug-assets)
- Error tracking
- Profiling
- Community reactivity (issues and pull-request on GitHub, and [pug] [php] keywords on https://stackoverflow.com/search?q=pug php)
Installation
In your favorite framework
If you use one of the following frameworks, click on the link to see how to install phug directly in your application.
Laravel:
bkwld/laravel-pug
Symfony:
pug-php/pug-symfony
Phalcon:
pug-php/pug-phalcon
CodeIgniter:
ci-pug/ci-pug
Yii 2:
pug/yii2
Slim:
pug/slim
Silex: implementation example
Lumen: bkwld/laravel-pug also works with Lumen
Zend Expressive infw/pug
The framework adapters above are based on Pug-php 3, that means expressions
should be written in JS style by default, but you can use PHP native style by
setting expressionLanguage to php.
If you want us to support some other framework, please open an issue here: https://github.com/phug-php/phug/issues/new and if your issue get some votes, we'll work on it.
In your favorite CMS
- WordPress: wordless
Installation from scratch
First you need composer if you have'nt yet: https://getcomposer.org/download/
Then run in your application directory:
composer require phug/phug
Replace composer with php composer.phar if you installed composer locally.
And same goes for every composer commands mentioned in this documentation.
Create a PHP file with the following content:
<?php

include_once __DIR__ . '/vendor/autoload.php';

Phug::display('p=$message', [
  'message' => 'Hello',
]);
You can edit first and second arguments of Phug::display in the code editors
below and see the results in the right panel.
p=$message
[
  'message' => 'Hello',
]
Phug::display take a template string as first argument, variables values
as second optional argument and a third optional argument allow you to specify
options (see Options chapter).
You can use Phug::displayFile to display a template file:
Phug::displayFile('views-directory/my-pug-template.pug');
The same optional variables and option arguments are available.
You can also return the result instead of displaying it with Phug::render
and Phug::renderFile.
The Phug class will also act like a facade for the Renderer class, it means
you can call statically on Phug\Phug any Phug\Rebderer's method. For example,
it makes compile and compileFile available:
file_put_contents('cache/my-compiled-page.php', Phug::compileFile('view/my-template.pug'));
This code will compile the template file view/my-template.pug and save it into
cache/my-compiled-page.php, this is basically what we do when the cache
option is set.
You may notice the PHP file contain debug code, this code allow us to provide you accurate error trace (give you matching line and offset in the pug source) and profiling tools to check performance.
In production, you can easily disable that stuff with setOption:
Phug::setOption('debug', false);

echo Phug::compile('p=$userName');
This will display the PHP compiled code with no debug code.
See all available methods in the API reference:
Use JavaScript expressions
By default, Phug and Tale-pug use PHP expressions. And Pug-php use JS expressions, but you can easily change the default behavior.
To handle js-style expressions on Phug and Tale-pug, install the js-phpize extension for Phug:
composer require js-phpize/js-phpize-phug
Replace composer with php composer.phar if you installed composer locally.
Then enable the extension before calling the render/display method:
<?php

use JsPhpize\JsPhpizePhug;

include_once __DIR__ . '/vendor/autoload.php';

Phug::addExtension(JsPhpizePhug::class);

Phug::display('p=userName', [
  'userName' => 'Bob',
]);
label Username
input(value=userName)
[
  'userName' => 'Bob',
]
To use PHP expressions in Pug-php, use the option expressionLanguage:
<?php

use Pug\Pug;

include_once __DIR__ . '/vendor/autoload.php';

$pug = new Pug([
    'expressionLanguage' => 'php',
]);

$pug->display('p=$user->name', [
  'user' => (object) [
    'name' => 'Bob',
  ],
]);
label Username
input(value=$user->name)
[
  'user' => (object) [
    'name' => 'Bob',
  ],
]
Switch expression language inside template
Since js-phpize-phug 2.1.0, it's now possible to switch between both styles inside templates.
body
  //- Whatever the options, we swtich to js mode
  language js
  - counter = 0

  node-language php
  div
    //- This node (the div tag) and its children
    //- will use php mode by default
    - $counter++
    span= $counter++
    //- Switch to js mode until new order
    language js
    - counter++
    - counter++
    //- And php again
    language php
    p= $counter

  section
    //- Outside the node (div tag), we go back to
    //- the previous mode
    p= counter
    //- language and node-language can also be called
    //- throught comments
    //- @language php
    p= $counter
Usage
Create one or more templates directories, and create pug files in them.
For example, imagine that myView.pug is in the views/directory directory and contains:
h1=$title
[
  'title' => 'Header',
]
You can display the matching HTML of this file like this:
<?php

include_once __DIR__ . '/vendor/autoload.php';

$variables = [
   'title' => 'Header',
];

$options = [
  'paths' => [
    'views/directory',
  ],
];

Phug::displayFile('myView', $variables, $options);
We recommend to use displayFile as much as possible for
performances (displayFile is faster than
echo renderFile) and files can be cached faster than a
raw content so in production
displayFile('myView.pug') is faster than
display('the content of the file').
In production, we also recommend to use the Optimizer and the cache:
<?php

include_once __DIR__ . '/vendor/autoload.php';

// Replace with your own environment calculation
$environment = getenv('ENVIRONMENT') ?: 'production';

$variables = [
   'title' => 'Header',
];

$options = [
  'debug'     => false,
  'cache_dir' => 'cache/directory',
  'paths'     => [
    'views/directory',
  ],
];

if ($environment === 'production') {
    \Phug\Optimizer::call('displayFile', ['myView', $variables], $options);

    exit;
}

$options['debug'] = true;
$options['cache_dir'] = null;

Phug::displayFile('myView', $variables, $options);
The Optimizer is a tool that avoid to load the Phug engine if a file is available in the cache. In counterpart, it does not allow to change the adapter or user post-render events.
If you use Pug-php, just replace in the code above
\Phug\Optimizer with \Pug\Optimizer and
Phug::displayFile with \Pug\Facade::displayFile.
The cache can be used in development too to save time.
In production, you should use the --optimize-autoloader
option of composer to optimize the autoloader when installing
dependencies. Then you should cache all your templates to
get benefit of the
up_to_date_check option
composer update --optimize-autoloader
./vendor/bin/phug compile-directory views/directory cache/directory '{"debug":"false"}'
By doing this for each deployment on your server,
you will be able to set up_to_date_check option to true
to directly load cache file with no file check.
In development environment, you can update automatically the cache and auto-refresh the page using the watcher.
See CLI for more information about the command line.
API reference
This is a summary of main methods available. You also can view the auto-generated documentation by clicking the link below:
displayFile
$template = '/my/template/file.pug';
$localVariables = [
  'variableName' => 'value',
];
$options = [
  'cache_dir' => '/path/to/a/cache/folder',
];


// Facade way (with Phug)
Phug::displayFile($template, $localVariables, $options);


// Instance way (with Phug)
$renderer = new Phug\Renderer($options);
$renderer->displayFile($template, $localVariables);


// Facade way (with Pug-php)
Pug\Facade::displayFile($template, $localVariables, $options);


// Instance way (with Pug-php)
$renderer = new Pug($options);
$renderer->displayFile($template, $localVariables);
This output the renderer template file given to the standard output. This is the recommended way to use Phug.
Check the usage section to see how to optimize it in production.
Check the options section to see the complete list of available options.
display
Behave like displayFile but takes pug source code as first
argument:
$template = '
div: p.examples
  em Foo
  strong(title="Bar") Bar
';


// Facade way (with Phug)
Phug::display($template, $localVariables, $options);


// Instance way (with Phug)
$renderer = new Phug\Renderer($options);
$renderer->display($template, $localVariables);


// Facade way (with Pug-php)
Pug\Facade::displayString($template, $localVariables, $options);


// Instance way (with Pug-php)
$renderer = new Pug($options);
$renderer->displayString($template, $localVariables);
Note: If you use Pug-php, it will try to detect if the given
string is a file
path and fallback on displayFile. This behavior is for backward
compatibility but you're encouraged to disabled it by setting
the "strict" option to true or use displayString.
renderFile
renderFile is the same as displayFile but returns the output
instead of display it.
render
render is the same as display but returns the output
instead of display it.
Note: If you use Pug-php, it will try to detect if the given
string is a file
path and fallback on renderFile. This behavior is for backward
compatibility but you're encouraged to disabled it by setting
the "strict" option to true or use renderString.
renderAndWriteFile
Render a pug file then write the final result (often the HTML) in a file.
Returns true in case of success, false else.
$input = '/mon/fichier/template.pug';
$output = '/ma/page.html';
$variablesLocales = [
  'nomDeVariable' => 'valeur',
];
$options = [/* ... */];


// Facade way (with Phug)
Phug::setOptions($options);
if (Phug::renderAndWriteFile($input, $output, $localVariables)) {
  echo 'File written successfully.';
}


// Instance way (with Phug)
$renderer = new Phug\Renderer($options);
if ($renderer->renderAndWriteFile($input, $output, $localVariables)) {
  echo 'File written successfully.';
}


// Facade way (with Pug-php)
Pug\Facade::setOptions($options);
Pug\Facade::renderAndWriteFile($input, $output, $localVariables)) {
  echo 'File written successfully.';
}


// Instance way (with Pug-php)
$renderer = new Pug($options);
if ($renderer->renderAndWriteFile($input, $output, $localVariables)) {
  echo 'File written successfully.';
}
renderDirectory
Render all pug template files (recursively) in an input directory and output in an output directory. If no output directory specified, the same directory is used for input and output.
Returns an array with success count and error count.
$renderer = new Phug\Renderer($options); // or $renderer = new Pug($options);

$renderer->renderDirectory('./my-views'); // render with no local variables all templates in ./my-views
                                          // and write .html files next to pug files
$renderer->renderDirectory('./my-views', ['foo' => 'bar']); // the same with local variables
$renderer->renderDirectory('./my-views', './my-pages'); // render with no local variables all templates in ./my-views
                                                       // and write .html files in ./my-pages
$renderer->renderDirectory('./my-views', './my-pages', ['foo' => 'bar']); // the same with local variables
$renderer->renderDirectory('./my-views', './my-pages', '.xml'); // use .xml extension instead of the default .html
$renderer->renderDirectory('./my-views', './my-pages', '.xml', ['foo' => 'bar']); // the same with local variables
compileFile
Compile a file and return the rendering code. It means when
renderFile typically returns HTML, compileFile mostly returns
PHP, by executing this PHP code, you would get the final HTML.
This may allow you for example to delegate the view rendering and caching to an other engine/framework.
$template = '/my/template/file.pug';
$options = [
  // only compilation options, since rendering options
  // will not be used.
];

// Facade way (with Phug)
Phug::setOptions($options);
Phug::compileFile($template);


// Instance way (with Phug)
$renderer = new Phug\Renderer($options);
$renderer->compileFile($template);


// Facade way (with Pug-php)
Pug\Facade::setOptions($options);
Pug\Facade::compileFile($template);


// Instance way (with Pug-php)
$renderer = new Pug($options);
$renderer->compileFile($template);
compile
Behave like compileFile but takes pug source code as first
argument.
cacheFile
Compile a pug file and save it in the cache directory specified via the options.
cacheFileIfChanged
Compile a pug file and save it in the cache directory specified via the options except if an up-to-date file is already present in it.
cacheDirectory
Cache all pug files (recursively) in the directory passed as argument.
Advanced methods
See the complete API documentation.
Language reference
As Phug aims to be pugjs compliant, the language reference is nearly the same as the one you can find for pugjs and this chapter follow the pugjs one content except for Phug specificities and live code editors that allows you to test with the Phug engine.
Attributes
Tag attributes look similar to HTML (with optional commas), but their values are just expressions.
a(href='google.com') Google
="\n"
a(class='button' href='google.com') Google
="\n"
a(class='button', href='google.com') Google
(="\n" are just here to add whitespace between links for an
easier reading of the output HTML).
Normal PHP expressions work fine by default on Phug and
Tale-pug; and on Pug-php with expressionLanguage
option set to php:
- $authenticated = true
body(class=$authenticated ? 'authed' : 'anon')
Normal JavaScript expressions work fine too with js-phpize-phug
extension installed (see how to install)
or Pug-php last version with default options (or expressionLanguage
set to js):
- var authenticated = true
body(class=authenticated ? 'authed' : 'anon')
Multiline Attributes
If you have many attributes, you can also spread them across many lines:
input(
  type='checkbox'
  name='agreement'
  checked
)
Multiline texts are not at all a problem either you use JS or PHP expressions:
input(data-json='
  {
    "very-long": "piece of ",
    "data": true
  }
')
Note: if you migrate templates from a JavaScript project you might
have to replace ` by simple quotes ' or double
quotes ".
Quoted Attributes
If your attribute name contains odd characters that might interfere
with expressions syntax, either quote it using "" or '', or use
commas to separate different attributes. Examples of such characters
include [] and () (frequently used in Angular 2).
//- In this case, `[click]` is treated
//- as an offset getter, resulting
//- in the unusual error.
div(class='div-class' [click]='play()')
div(class='div-class', [click]='play()')
div(class='div-class' '[click]'='play()')
Attribute Interpolation
A small note about a syntax you may hav known in pugjs 1:
a(href="/#{url}") Link, this syntax is no longer valid in pugjs 2
and so we decided to not support it in Phug. You can use native
interpolation depending on the expression style:
PHP interpolation (default options of Phug without js-phpize module):
- $btnType = 'info'
- $btnSize = 'lg'
button(type="button" class="btn btn-$btnType btn-$btnSize")
- $btn = (object) ['size' => 'lg']
button(type="button" class="btn btn-{$btn->size}")
For JS expressions (default options of Pug or with js-phpize module):
- btnType = 'info'
- btnSize = 'lg'
button(type="button" class=`btn btn-${btnType} btn-${btnType}`)
- btn = {size: 'lg'}
button(type="button" class=`btn btn-${btn.size}`)
Or use concatenation " + btnType + ".
Unescaped Attributes
By default, all attributes are escaped to prevent attacks (such as
cross site scripting). If you need to use special characters,
use != instead of =.
div(escaped="<code>")
div(unescaped!="<code>")
Caution, unescaped buffered code can be dangerous. You must be sure to sanitize any user inputs to avoid cross-site scripting.
Unchecked attributes
Here is a specific concept of Phug you would not find in pugjs, it's about checking a variable exist.
In PHP, when error are displayed and error level enable notices, calling a non-existing variable will throw an error.
By default, we will hide those error, but this could hide some bug, so
you can use ?= operator to avoid this behavior:
- $wrong = ''
img(src?=$wronk)
In this example, the ?= operator will reveal the miss typo of "wrong".
Click on the [Preview] button to see the error.
Attributes can be both unchecked and unescaped:
- $html = '<strong>OK</strong>'
img(alt?!=$html)
To disable globally the checking (always throw an error if the variable
called is not defined), use the php_token_handlers option:
Phug::setOption(['php_token_handlers', T_VARIABLE], null);
Boolean Attributes
Boolean attributes are mirrored by Phug. Boolean values (true and
false) are accepted. When no value is specified true is assumed.
input(type='checkbox' checked)
="\n"
input(type='checkbox' checked=true)
="\n"
input(type='checkbox' checked=false)
="\n"
input(type='checkbox' checked='true')
If the doctype is html, Phug knows not to mirror the attribute,
and instead uses the terse style (understood by all browsers).
doctype html
="\n"
input(type='checkbox' checked)
="\n"
input(type='checkbox' checked=true)
="\n"
input(type='checkbox' checked=false)
="\n"
input(type='checkbox' checked='checked')
Style Attributes
The style attribute can be a string, like any normal attribute; but
it can also be an object or an array.
PHP-style:
a(style=['color' => 'red', 'background' => 'green'])
="\n"
a(style=(object)['color' => 'red', 'background' => 'green'])
a(style={color: 'red', background: 'green'})
Class Attributes
The class attribute can be a string, like any normal attribute;
but it can also be an array of class names, which is handy when
generated.
- $classes = ['foo', 'bar', 'baz']
a(class=$classes)
="\n"
//- the class attribute may also be repeated to merge arrays
a.bang(class=$classes class=['bing'])
It can also be an array which maps class names to true or
false values. This is useful for applying conditional classes.
PHP-style:
- $currentUrl = '/about'
a(ref='/' class=['active' => $currentUrl === '/']) Home
="\n"
a(href='/about' class=['active' => $currentUrl === '/about']) About
- var currentUrl = '/about'
a(href='/' class={active: currentUrl === '/'}) Home
="\n"
a(href='/about' class={active: currentUrl === '/about'}) About
Class Literal
Classes may be defined using a .classname syntax:
a.button
Since div's are such a common choice of tag, it is the
default if you omit the tag name:
.content
ID Literal
IDs may be defined using a #idname syntax:
a#main-link
Since div's are such a common choice of tag,
it is the default if you omit the tag name:
#content
&attributes
Pronounced as “and attributes”, the &attributes syntax can
be used to explode an array into attributes of an element.
PHP-style:
div#foo(data-bar="foo")&attributes(['data-foo' => 'bar'])
div#foo(data-bar="foo")&attributes({'data-foo': 'bar'})
The above examples uses an array literal. But you can also use a variable whose value is an array, too. (See also: Mixin Attributes).
- $attributes = []
- $attributes['class'] = 'baz'
div#foo(data-bar="foo")&attributes($attributes)
Caution, attributes applied using &attributes are not
automatically escaped. You must be sure to sanitize any user
inputs to avoid
cross-site scripting
(XSS). If passing in attributes from a mixin call, this is
done automatically.
Case
The case statement is a shorthand for the PHP switch statement.
It takes the following form:
- $friends = 10
case $friends
  when 0
    p you have no friends
  when 1
    p you have a friend
  default
    p you have #{$friends} friends
Case Fall Through
You can use fall through, just as you would in a PHP switch statement.
- $friends = 0
case $friends
  when 0
  when 1
    p you have very few friends
  default
    p you have #{$friends} friends
The difference, however, is a fall through in PHP happens whenever a
break statement is not explicitly included; in Phug, it only happens
when a block is completely missing.
If you would like to not output anything in a specific case, add an explicit
unbuffered break:
- $friends = 0
case $friends
  when 0
    - break
  when 1
    p you have very few friends
  default
    p you have #{$friends} friends
Block Expansion
Block expansion may also be used:
- $friends = 1
case $friends
  when 0: p you have no friends
  when 1: p you have a friend
  default: p you have #{$friends} friends
Code
Phug allows you to write inline PHP or JavaScript code in your templates. The code can be buffered or not. When it is buffered, it can be escaped or not, checked or not the same way as attributes.
Unbuffered Code
Unbuffered code starts with -. It does not directly add
anything to the output.
- for ($x = 0; $x < 3; $x++)
  li item
Phug also supports block unbuffered code:
-
  $list = ["Uno", "Dos", "Tres",
          "Cuatro", "Cinco", "Seis"]
each $item in $list
  li= $item
Buffered Code
Buffered code starts with =. It evaluates the PHP or JavaScript
expression and outputs the result.
For security, buffered code is first HTML escaped.
p
  = 'This code is <escaped>!'
It can also be written inline, and supports the full range of expressions:
p= 'This code is' . ' <escaped>!'
Note: if you use JavaScript expressions, concatenations must use
the + operator:
p= 'This code is' + ' <escaped>!'
Unescape/escape code
Precede the = with ! to not escape HTML entities, with ?
to not check variables to be set and ?! for both:
- $start = '<strong>'
- $end = '</strong>'
//- This one is escaped
div= $start . 'Word' . $end
//- This one is not escaped
div!= $start . 'Word' . $end
//- Both are checked
div= 'start' . $middle . 'end'
div!= 'start' . $middle . 'end'
Uncheck/check code
Checked code does not throw an error when variables are undefined.
Unchecked code throws an error when variables are undefined. See the examples below with on the one hand an existing variable, and on the other hand a missing variable:
- $middle = ' middle '
div?= 'start' . $middle . 'end'
div?!= 'start' . $middle . 'end'
div?= 'start' . $middle . 'end'
div?!= 'start' . $middle . 'end'
Caution: unescaped buffered code can be dangerous. You must be sure to sanitize any user inputs to avoid cross-site scripting (XSS).
Commentaires
Buffered comments look the same as single-line JavaScript comments. They act sort of like markup tags, producing HTML comments in the rendered page.
Like tags, buffered comments must appear on their own line.
// just some paragraphs
p foo
p bar
// each line
// will produce
// a HTML comment
footer
Phug also supports unbuffered comments (they will be not compiled
so you can add many with no impact on the cache file size).
Simply add a hyphen (-) to the start of the comment.
//- will not output within markup
p foo
p bar
Block Comments
Block comments work, too:
body
  //-
    Comments for your template writers.
    Use as much text as you want.
  //
    Comments for your HTML readers.
    Use as much text as you want.
Conditional Comments
Phug does not have any special syntax for conditional comments. (Conditional comments are a peculiar method of adding fallback markup for old versions of Internet Explorer.)
However, since all lines beginning with < are treated as plain
text, normal HTML-style conditional comments work
just fine.
doctype html

<!--[if IE 8]>
<html lang="fr" class="lt-ie9">
<![endif]-->
<!--[if gt IE 8]><!-->
<html lang="fr">
<!--<![endif]-->

body
  p Supporting old web browsers is a pain.

</html>
Conditionals
Conditionals look like the following if you use PHP-style:
- $user = [ 'description' => 'foo bar baz' ]
- $authorised = false
#user
  if $user['description']
    h2.green Description
    p.description= $user['description']
  else if $authorised
    h2.blue Description
    p.description.
      User has no description,
      why not add one...
  else
    h2.red Description
    p.description User has no description
If you use JS-style:
- var user = { description: 'foo bar baz' }
- var authorised = false
#user
  if user.description
    h2.green Description
    p.description= user.description
  else if authorised
    h2.blue Description
    p.description.
      User has no description,
      why not add one...
  else
    h2.red Description
    p.description User has no description
Note: When using JS-style, multiple conditionals such as if 1 - 1 || 1 + 1 (truthy/falsy expressions joined with and/or/&&/||) do not work as expected (See this issue). You will need to wrap each statement in parentheses, eg if (1 - 1) || (1 + 1) to get the same precedence as JS or PHP language.
Phug also provides the conditional unless, which works
like a negated if.
PHP-style example:
unless $user['isAnonymous']
  p You're logged in as #{$user['name']}.
//- is equivalent to
if !$user['isAnonymous']
  p You're logged in as #{$user['name']}.
[
  'user' => [
    'isAnonymous' => false,
    'name' => 'Jefferson Airplane',
  ],
]
JS-style example:
unless user.isAnonymous
  p You're logged in as #{user.name}.
//- is equivalent to
if !user.isAnonymous
  p You're logged in as #{user.name}.
[
  'user' => [
    'isAnonymous' => false,
    'name' => 'Jefferson Airplane',
  ],
]
Doctype
doctype html
Doctype Shortcuts
Shortcuts to commonly used doctypes:
doctype html
doctype xml
doctype transitional
doctype strict
doctype frameset
doctype 1.1
doctype basic
doctype mobile
doctype plist
Custom Doctypes
You can also use your own literal custom doctype:
doctype html PUBLIC "-//W3C//DTD XHTML Basic 1.1//EN"
Doctype Option
In addition to being buffered in the output, a doctype in Phug
can affect compilation in other ways. For example, whether
self-closing tags end with /> or > depends on whether HTML
or XML is specified. The output of
boolean attributes
may be affected as well.
If, for whatever reason, it is not possible to use the doctype
keyword (e.g., just rendering HTML fragments), but you would
still like to specify the doctype of the template, you can do
so via the doctype option.
$source = 'img(src="foo.png")';

Phug::render($source);
// => '<img src="foo.png"/>'

Phug::render($source, [], [
  'doctype' => 'xml',
]);
// => '<img src="foo.png"></img>'

Phug::render($source, [], [
  'doctype' => 'html',
]);
// => '<img src="foo.png">'
Filters
Filters let you use other languages in Pug templates. They take a block of plain text as an input.
To pass options to the filter, add them inside parentheses after
the filter name (just as you would do with
tag attributes): :less(compress=false).
All JSTransformer modules can be used as Pug filters. Popular filters include :babel, :uglify-js, :scss, and :markdown-it. Check out the documentation for the JSTransformer for the options supported for the specific filter.
To use JSTransformer with Phug, install the following extension:
composer require phug/js-transformer-filter
Then enable it:
use Phug\JsTransformerExtension;

Phug::addExtension(JsTransformerExtension::class);
With Pug-php, this extension is installed and enabled by default since 3.1.0 version.
You can also use any of the following PHP projects as filter in all Phug and Pug-php projects: http://pug-filters.selfbuild.fr
If you can't find an appropriate filter for your use case, you can write your own custom filter. It can be any callable (closure, function or object with __invoke method).
Phug::setFilter('upper-start', function ($inputString, $options) {
  return strtoupper(mb_substr($inputString, 0, $options['length'])).
    mb_substr($inputString, $options['length']);
});

Phug::display('
div
  :upper-start(length=3)
    gggggg
');
This will output:
<div>GGGggg</div>
The same goes for Pug-php:
$pug = new Pug();
$pug->setFilter('upper-start', function ($inputString, $options) {
  return strtoupper(mb_substr($inputString, 0, $options['length'])).
    mb_substr($inputString, $options['length']);
});

$pug->display('
div
  :upper-start(length=3)
    gggggg
');
The current compiler is passed as third argument so you can get any information from it:
Phug::setFilter('path', function ($inputString, $options, CompilerInterface $compiler) {
  return $compiler->getPath();
});

Phug::displayFile('some-template.pug');
In this example, if some-template.pug contains
:path filter calls, it will display the full
path of the current file compiling (example:
/directory/some-template.pug or some other
file if called inside an extended/included file).
Phug comes with cdata filter pre-installed:
data
  :cdata
    Since this is a CDATA section
    I can use all sorts of reserved characters
    like > < " and &
    or write things like
    <foo></bar>
    but my document is still well formed!
Pug-php pre-install JsTransformerExtension and embed cdata,
css, escaped, javascript, php, pre, script
and if you not set the filterAutoLoad to false, it will load
automatically as filter any invokable class in the Pug\Filter
namespace:
doctype html
html
  head
    :css
      a {
        color: red;
      }
  body
    :php
      $calcul = 9 + 8
    p=calcul
    :escaped
      <foo>
    :pre
      div
        h1 Example of Pug code
    :javascript
      console.log('Hello')
    :script
      console.log('Alias of javascript')
Includes
Includes allow you to insert the contents of one Pug file into another.
//- index.pug
doctype html
html
  include includes/head.pug
  body
    h1 My Site
    p Welcome to my super lame site.
    include includes/foot.pug
//- includes/head.pug
head
  title My Site
  script(src='/javascripts/jquery.js')
  script(src='/javascripts/app.js')
//- includes/foot.pug
footer#footer
  p Copyright (c)
    =date(' Y')
If the path is absolute (e.g., include /root.pug), it is resolved
from paths option. This option works like the basedir in
pugjs but allow you to specify multiple directories. The basdir
option also exists in Pug-php to provide full pugjs options
supports but we recommend you prefer paths.
Otherwise, paths are resolved relative to the current file being compiled.
If no file extension is given, .pug is automatically appended to
the file name.
Including Plain Text
Including non-Pug files simply includes their raw text.
//- index.pug
doctype html
html
  head
    style
      include style.css
  body
    h1 My Site
    p Welcome to my super lame site.
    script
      include script.js
/* style.css */
h1 {
  color: red;
}
// script.js
console.log('You are awesome');
Including Filtered Text
You can combine filters with includes, allowing you to filter things as you include them.
//- index.pug
doctype html
html
  head
    title An article
  body
    include:markdown article.md
# article.md

This is an article written in markdown.
Template Inheritance
Phug supports template inheritance. Template inheritance works
via the block and extends keywords.
In a template, a block is simply a “block” of Pug that a child
template may replace. This process is recursive.
Phug blocks can provide default content, if appropriate. Providing
default content is purely optional, though. The example below
defines block scripts, block content, and block foot.
//- layout.pug
html
  head
    title My Site - #{$title}
    block scripts
      script(src='/jquery.js')
  body
    block content
    block foot
      #footer
        p some footer content
[
  'title' => 'Blog',
]
*No $ needed if you use JS-style
To extend this layout, create a new file and use the extends
directive with a path to the parent template. (If no file
extension is given, .pug is automatically appended to the
file name.) Then, define one or more blocks to override the
parent block content.
Below, notice that the foot block is not redefined, so it
will use the parent's default and output “some footer content”.
//- page-a.pug
extends layout.pug

block scripts
  script(src='/jquery.js')
  script(src='/pets.js')

block content
  h1= $title
  each $petName in $pets
    include pet.pug
[
  'title' => 'Blog',
  'pets'  => ['cat', 'dog']
]
//- pet.pug
p= $petName
*No $ needed if you use JS-style
It's also possible to override a block to provide additional blocks, as
shown in the following example. As it shows, content now exposes a
sidebar and primary block for overriding. (Alternatively, the child
template could override content altogether.)
//- sub-layout.pug
extends layout.pug

block content
  .sidebar
    block sidebar
  .primary
    block primary
//- page-b.pug
extends sub-layout.pug

block sidebar
  p something

block primary
  p something else
Block append / prepend
Phug allows you to replace (default), prepend, or append blocks.
Suppose you have default scripts in a head block that you wish to use on
every page, you might do this:
//- page-layout.pug
html
  head
    block head
      script(src='/vendor/jquery.js')
      script(src='/vendor/caustic.js')
  body
    block content
Now, consider a page of your JavaScript game. You want some game related
scripts as well as these defaults. You can simply append the block:
//- page.pug
extends page-layout.pug

block append head
  script(src='/vendor/three.js')
  script(src='/game.js')
When using block append or block prepend, the word “block” is
optional:
//- page.pug
extends page-layout.pug

append head
  script(src='/vendor/three.js')
  script(src='/game.js')
Common mistakes
Phug's template inheritance is a powerful feature that allows you to split complex page template structures into smaller, simpler files. However, if you chain many, many templates together, you can make things a lot more complicated for yourself.
Note that only named blocks and mixin definitions can appear at the top
(unindented) level of a child template. This is important! Parent templates
define a page's overall structure, and child templates can only append,
prepend, or replace specific blocks of markup and logic. If a child
template tried to add content outside of a block, Phug would have no way
of knowing where to put it in the final page.
This includes unbuffered code, which the placement can have an impact and buffered comments as they produce HTML comments which would have nowhere to go in the resulting HTML. (Unbuffered Pug comments, however, can still go anywhere.)
Interpolation
Phug provides operators for a variety of your different interpolative needs.
String Interpolation, Escaped
Consider the following code:
- $title = "On Dogs: Man's Best Friend";
- $author = "enlore";
- $theGreat = "<span>escape!</span>";

h1= $title
p Written with love by #{$author}
p This will be safe: #{$theGreat}
title follows the basic pattern for evaluating a template local, but
the code in between #{ and } is evaluated, escaped, and the result
buffered into the output of the template being rendered.
This can be any valid expression, so you can do whatever feels good.
- $msg = "not my inside voice";
p This is #{strtoupper($msg)}
Phug is smart enough to figure out where the expression ends, so you can
even include } without escaping.
p No escaping for #{'}'}!
If you need to include a verbatim #{, you can either escape it, or use
interpolation.
p Escaping works with \#{$interpolation}
p Interpolation works with #{'#{$interpolation}'} too!
String Interpolation, Unescaped
- $riskyBusiness = "<em>Some of the girls are wearing my mother's clothing.</em>";
.quote
  p Joel: !{$riskyBusiness}
Caution ! Keep in mind that buffering unescaped content into your templates can be mighty risky if that content comes fresh from your users. Never trust user input!
Tag Interpolation
Interpolation works with Phug as well. Just use the tag interpolation syntax, like so:
p.
  This is a very long and boring paragraph that spans multiple lines.
  Suddenly there is a #[strong strongly worded phrase] that cannot be
  #[em ignored].
p.
  And here's an example of an interpolated tag with an attribute:
  #[q(lang="es") ¡Hola Mundo!]
Wrap an inline Phug tag declaration in #[ and ], and it'll be
evaluated and buffered into the content of its containing tag.
Whitespace Control
The tag interpolation syntax is especially useful for inline tags, where whitespace before and after the tag is significant.
By default, however, Phug removes all spaces before and after tags. Check out the following example:
p
  | If I don't write the paragraph with tag interpolation, tags like
  strong strong
  | and
  em em
  | might produce unexpected results.
p.
  If I do, whitespace is #[strong respected] and #[em everybody] is happy.
See the section Plain Text for more information and examples on this topic.
Iteration
Phug supports two primary methods of iteration: each and while.
each
each is the easiest way to iterate over arrays and objects in
a template:
PHP-style:
ul
  each $val in [1, 2, 3, 4, 5]
    li= $val
ul
  each val in [1, 2, 3, 4, 5]
    li= val
You can also get the index as you iterate:
PHP-style:
ul
  each $val, $index in ['zero', 'one', 'two']
    li= $index . ': ' . $val
ul
  each val, index in ['zero', 'one', 'two']
    li= index + ': ' + val
Phug also lets you iterate over the keys in an object:
PHP-style:
ul
  each $val, $index in (object) ['one' => 'ONE', 'two' => 'TWO', 'three' => 'THREE']
    li= $index . ': ' . $val
ul
  each val, index in {one: 'ONE', two: 'TWO', three: 'THREE'}
    li= index + ': ' + val
The object or array to iterate over can be a variable, or the result of a function call, or almost anything else.
PHP-style:
- $values = []
ul
  each $val in count($values) ? $values : ['There are no values']
    li= $val
- var values = [];
ul
  each val in values.length ? values : ['There are no values']
    li= val
One can also add an else block that will be executed if the array
or object does not contain values to iterate over. The following
is equivalent to the example above:
PHP-style:
- $values = []
ul
  each $val in $values
    li= $val
  else
    li There are no values
- var values = [];
ul
  each val in values
    li= val
  else
    li There are no values
You can also use for as an alias of each.
A special feature of Phug (not available in pugjs) also allow you
to use for like a PHP for loop:
ul
  for $n = 0; $n < 4; $n++
    li= $n
Last note about the iterations variables scope: be aware they erase previous variables with the same names:
- $index = 'foo'
- $value = 'bar'
each $value, $index in ['key' => 'value']
| $index = #{$index}
| $value = #{$value}
while
You can also use while to create a loop:
- $n = 0
ul
  while $n < 4
    li= $n++
Mixins
Mixins allow you to create reusable blocks of Phug.
//- Declaration
mixin list
  ul
    li foo
    li bar
    li baz
//- Use
+list
+list
Mixins are compiled to functions, and can take arguments:
mixin pet($name)
  li.pet= $name
ul
  +pet('cat')
  +pet('dog')
  +pet('pig')
No need to prefix parameters/variables with $ if you
use JS-style
Mixin Blocks
Mixins can also take a block of Phug to act as the content:
mixin article($title)
  .article
    .article-wrapper
      h1= $title
      if $block
        block
      else
        p No content provided

+article('Hello world')

+article('Hello world')
  p This is my
  p Amazing article
No need to prefix parameters/variables with $ if you
use JS-style
Important: in pugjs, the block variable is a function
representation of the block. In Phug, we just pass a
boolean as an helper to know if the mixin call has children
elements. So you can use $block anywhere inside the mixin
declaration (or just block if you
use JS-style) and you will
get true if the block is filled, false if it's empty.
Mixin Attributes
Mixins also get an implicit attributes argument, which is
taken from the attributes passed to the mixin:
PHP-style:
mixin link($href, $name)
  //- attributes == {class: "btn"}
  a(class!=$attributes['class'], href=$href)= $name

+link('/foo', 'foo')(class="btn")
- var values = [];
mixin link(href, name)
  //- attributes == {class: "btn"}
  a(class!=attributes.class href=href)= name

+link('/foo', 'foo')(class="btn")
Note: The values in attributes by default are already
escaped! You should use != to avoid escaping them a second
time. (See also unescaped attributes.)
You can also use mixins with &attributes:
PHP-style:
mixin link($href, $name)
  a(href=$href)&attributes($attributes)= $name

+link('/foo', 'foo')(class="btn")
mixin link(href, name)
  a(href=href)&attributes(attributes)= name

+link('/foo', 'foo')(class="btn")
Note: The syntax +link(class="btn") is also valid and equivalent
to +link()(class="btn"), since Phug tries to detect if parentheses’
contents are attributes or arguments. Nevertheless, we encourage you
to use the second syntax, as you pass explicitly no arguments and you
ensure the first parenthesis is the arguments list.
Rest Arguments
You can write mixins that take an unknown number of arguments using the “rest arguments” syntax.
PHP-style:
mixin list($id, ...$items)
  ul(id=$id)
    each $item in $items
      li= $item

+list('my-list', 1, 2, 3, 4)
mixin list(id, ...items)
  ul(id=id)
    each item in items
      li= item

+list('my-list', 1, 2, 3, 4)
Component
As this feature is not available in Pug.js we provide it as a plugin to install using composer:
composer require phug/component
Components are multi-slots mixins similar to components in technologies like Vue.js, Angular, React or Blade.
See complete documentation: https://github.com/phug-php/component
Plain Text
Phug provides four ways of getting plain text — that is, any code or text content that should go, mostly unprocessed, directly into the rendered HTML. They are useful in different situations.
Plain text does still allow tag and string interpolation, but because plain text is not escaped, you can also include literal HTML.
One common pitfall here is managing whitespace in the rendered HTML. We'll talk about that at the end of this chapter.
Inline in a Tag
The easiest way to add plain text is inline. The first term on the line is the tag itself. Everything after the tag and one space will be the text contents of that tag. This is most useful when the plain text content is short (or if you don't mind lines running long).
p This is plain old <em>text</em> content.
Literal HTML
Whole lines are also treated as plain text when they begin with a
left angle bracket (<), which may occasionally be useful for writing
literal HTML tags in places that could otherwise be inconvenient.
For example, one use case is
conditional comments.
Since literal HTML tags do not get processed, they do not
self-close, unlike Phug tags.
<html>

body
  p Both open and close of the html tag are considered
  p as a line of literal HTML.

</html>
Warning: In pugjs, indent the content (body in this example)
has no incidence. In pugjs, only lines starting with <
are literal HTML no mater the indent.
But in Phug (and so pug-php too), we consider that indented
content after a line starting with < is also literal HTML and
so not processed, so if you indent body in this example, it will
become unprocessed text content of the <html> tag.
This feature allow you to copy-paste indented HTML as it from anywhere to your templates:
.foo
  #bar
    <p>
      Unprocessed text #{'except for interpolations'}
    </p>
    <p>
      Title
      <a href="/link">
        Button
      </a>
    </p>
    p This is #[strong Phug] code again
Piped Text
Another way to add plain text to templates is to prefix a line
with a pipe character (|). This method is useful for mixing
plain text with inline tags, as we discuss later, in the
Whitespace Control section.
p
  | The pipe always goes at the beginning of its own line,
  | not counting indentation.
Block in a Tag
Often you might want large blocks of text within a tag.
A good example is writing JavaScript and CSS code in
the script and style tags. To do this, just add a .
right after the tag name, or after the closing parenthesis,
if the tag has attributes.
There should be no space between the tag and the dot. Plain text contents of the tag must be indented one level:
script.
  if (usingPug)
    console.log('you are awesome')
  else
    console.log('use pug')
You can also create a dot block of plain text after other tags within the parent tag.
div
  p This text belongs to the paragraph tag.
  br
  .
    This text belongs to the div tag.
Whitespace Control
Managing the whitespace of the rendered HTML is one of the trickiest parts about learning Pug. Don't worry, though, you'll get the hang of it soon enough.
You just need to remember two main points about how whitespace works. When compiling to HTML:
- Phug removes indentation, and all whitespace
between elements.
- So, the closing tag of an HTML element will touch
the opening tag of the next. This is generally not a
problem for block-level elements like paragraphs,
because they will still render as separate paragraphs
in the web browser (unless you have changed their CSS
displayproperty). See the methods described below, however, for when you do need to insert space between elements.
- So, the closing tag of an HTML element will touch
the opening tag of the next. This is generally not a
problem for block-level elements like paragraphs,
because they will still render as separate paragraphs
in the web browser (unless you have changed their CSS
- Phug preserves whitespace within elements,
including:
- all whitespace in the middle of a line of text,
- leading whitespace beyond the block indentation,
- trailing whitespace,
- line breaks within a plain text block.
So… Phug drops the whitespace between tags, but keeps the whitespace inside them. The value here is that it gives you full control over whether tags and/or plain text should touch. It even lets you place tags in the middle of words.
| You put the em
em pha
| sis on the wrong syl
em la
| ble.
The trade-off is that it requires you to think about and take control over whether tags and text touch.
If you need the text and/or tags to touch — perhaps you need a period to appear outside the hyperlink at the end of a sentence — this is easy, as it’s basically what happens unless you tell Phug otherwise.
a ...sentence ending with a link
| .
If you need to add space, you have a few options:
Recommended Solutions
You could add one or more empty piped lines — a pipe with either spaces or nothing after it. This will insert whitespace in the rendered HTML.
| Don't
|
button#self-destruct touch
|
| me!
If your inline tags don’t require many attributes, you may find it easiest to use tag interpolation, or literal HTML, within a plain text block.
p.
  Using regular tags can help keep your lines short,
  but interpolated tags may be easier to #[em visualize]
  whether the tags and text are whitespace-separated.
Not recommended
Depending on where you need the whitespace, you could add an extra space at the beginning of the text (after the block indentation, pipe character, and/or tag). Or you could add a trailing space at the end of the text.
NOTE the trailing and leading spaces here:
| Hey, check out
a(href="http://example.biz/kitten.png") this picture
|  of my cat!
The above solution works perfectly well, but is admittedly perhaps a little dangerous: many code editors by default will remove trailing whitespace on save. You and all your contributors may have to configure your editors to prevent automatic trailing whitespace removal.
Tags
By default, text at the start of a line (or after only white space) represents an HTML tag. Indented tags are nested, creating the tree structure of HTML.
ul
  li Item A
  li Item B
  li Item C
Phug also knows which elements are self-closing:
img
Block Expansion
To save space, Phug provides an inline syntax for nested tags.
a: img
Self-Closing Tags
Tags such as img, meta, and link are automatically
self-closing (unless you use the XML doctype).
You can also explicitly self close a tag by appending
the / character. Only do this if you know what
you're doing.
foo/
foo(bar='baz')/
Rendered Whitespace
Whitespace is removed from the beginning and end of tags, so that you have control over whether the rendered HTML elements touch or not. Whitespace control is generally handled via plain text.
JS-style expressions
By using JS-style
You no longer need $ in front of your variables
but this is just the beginning of the amazing
transformations provided by js-phpize. Here is a
list of more advanced features:
Chaining
- foo = {bar: [{biz: [42]}]}

p=foo.bar[0].biz[0]
Array/object access
:php
  $obj = (object) ['foo' => 'bar'];
  $arr = ['foo' => 'bar'];

p=obj.foo
p=arr.foo
p=obj['foo']
p=arr['foo']
Method post-pone call
:php
  class Foo
  {
    public function bar()
    {
      return 42;
    }
  }

  $foo = new Foo;

- method = foo.bar

p=method()
Getter call
:php
  class Foo
  {
    public function __isset($name)
    {
      return $name === 'abc';
    }

    public function __get($name)
    {
      return "magic getter for $name";
    }

    public function getBar()
    {
      return 42;
    }
  }

  $foo = new Foo;

p=foo.bar
p=foo['bar']
p=foo.abc
p=foo['abc']
p=foo.nothandled
p=foo['nothandled']
:php
  class Machin implements ArrayAccess
  {
    public function offsetExists($name)
    {
      return $name === 'abc';
    }

    public function offsetGet($name)
    {
      return "magic getter for $name";
    }

    public function offsetSet($name, $value) {}

    public function offsetUnset($name) {}

    public function getTruc()
    {
      return 42;
    }
  }

  $machin = new Machin;

p=machin.truc
p=machin['truc']
p=machin.abc
p=machin['abc']
p=machin.nongere
p=machin['nongere']
Closure
p=implode(', ', array_filter([1, 2, 3], function (number) {
  return number % 2 === 1;
}))
Array.prototype emulation
- arr = [1, 2, 3]
p=arr.length
p=arr.filter(nombre => nombre & 1).join(', ')
p=arr.indexOf(2)
p=arr.slice(1).join('/')
p=arr.reverse().join(', ')
p=arr.splice(1, 2).join(', ')
p=arr.reduce((i, n) => i + n)
p=arr.map(n => n * 2).join(', ')
- arr.forEach(function (num) {
  div=num
- })
//- Yes all that is converted into PHP
String.prototype emulation
- text = "abcdef"
p=text.length
p=text[1]
p=text[-1]
p=text.substr(2, 3)
p=text.charAt(3)
p=text.indexOf('c')
p=text.toUpperCase()
p=text.toUpperCase().toLowerCase()
p=text.match('d')
p=text.split(/[ce]/).join(', ')
p=text.replace(/(a|e)/, '.')
Options
Equivalents for pugjs options
filename string
The name of the file being compiled. This is used if no file specified for path resolve and exception file detail:
Phug::compile("\n broken\nindent");
By default, when you compile, render or display an input string,
Phug give no source file info in exception and cannot resolve relative
include/extend.
Failed to parse: Failed to outdent: No parent to outdent to. Seems the parser moved out too many levels.
Near: indent

Line: 3
Offset: 1
With the filename option, it provides a fallback:
Phug::setOption('filename', 'foobar.pug');
Phug::compile("\n  broken\nindent");
...
Line: 3
Offset: 1
Path: foobar.pug
But, this option is ignored if you specify locally the filename:
Phug::setOption('filename', 'foobar.pug');
Phug::compile("\n  broken\nindent", 'something.pug');
...
Line: 3
Offset: 1
Path: something.pug
The same goes for compileFile, renderFile and displayFile:
Phug::displayFile('something.pug');
...
Line: 3
Offset: 1
Path: something.pug
basedir string
The root directory of all absolute inclusion. This option is
supported for pugjs compatibility reason, but we recommend you
to use the paths option instead. It has the same
purpose but you can specify an array of directories that will
be all tried (in the order you give them) to resolve
absolute path on include/extend and the first found
is used.
doctype string
If the doctype is not specified as part of the template, you
can specify it here. It is sometimes useful to get self-closing
tags and remove mirroring of boolean attributes. See
doctype documentation
for more information.
Note: the XML doctype can break when open short tags are enabled,
that's why by default, we replace <?xml with <<?= "?" ?>xml
when short_open_tag or hhvm.enable_short_tags is On
(this is the behavior when short_open_tag_fix option is
set to its default value: "auto") but you can switch this option
to true (to always enable the fix) or false (to always
disable it).
pretty boolean | string
[Deprecated.] Adds whitespace to the resulting HTML to make it
easier for a human to read using ' ' as indentation. If a
string is specified, that will be used as indentation instead
(e.g. '\t'). We strongly recommend against using this option.
Too often, it creates subtle bugs in your templates because
of the way it alters the interpretation and rendering of
whitespace, and so this feature is going to be removed.
Defaults to false.
filters array
Associative array of custom filters. Defaults to [].
Phug::setOption('filters', [
  'my-filter' => function ($text) {
    return strtoupper($text);
  },
]);
Phug::render("div\n  :my-filter\n    My text");
Returns:
<div>MY TEXT</div>
You can also use the method setFilter and your callback
can take options:
Phug::setFilter('add', function ($text, $options) {
  return $text + $options['value'];
});
Phug::render("div\n  :add(value=4) 5");
Returns:
<div>9</div>
And note that you can also use callable classes (classes
that contains an __invoke method) instead of a simple
callback function for your custom filters.
self boolean | string
Use a self namespace to hold the locals. Instead of
writing variable you will have to write
self.variable to access a property
of the locals object. Defaults to false.
Phug::setOption('self', true);
Phug::render('p=self.message', [
    'message' => 'Hello',
]);
Will output:
<p>Hello</p>
And you can pass any string as namespace as long as it's a valid variable name, so the following is equivalent:
Phug::setOption('self', 'banana');
Phug::render('p=banana.message', [
    'message' => 'Hello',
]);
debug boolean
If set to true, when an error occurs at render time, you
will get a complete stack trace including line and offset
in the original pug source file.
In production, you should set it to false to fasten
the rendering and hide debug information. It's done
automatically if you use framework adapters such as
pug-symfony or
laravel-pug.
shared_variables / globals array
List of variables stored globally to be available for
any further calls to render, renderFile, display
or displayFile.
globals and shared_variables are 2 different options
merged together, globals only exists to provide an
equivalent to the pugjs option. And methods like ->share
and ->resetSharedVariables only impact the the
shared_variables option, so we recommend you to use
shared_variables.
Phug::setOptions([
    'globals' => [
        'top' => 1,
        'right' => 1,
        'bottom' => 1,
        'left' => 1,
    ],
    'shared_variables' => [
        'right' => 2,
        'bottom' => 2,
        'left' => 2,
    ],
]);

Phug::share([
    'bottom' => 3,
    'left' => 3,
]);

Phug::display('="$top, $right, $bottom, $left"', [
    'left' => 4,
]);

Phug::resetSharedVariables();

Phug::display('="$top, $right, $bottom, $left"', [
    'left' => 5,
]);
The first display will outputs:
1, 2, 3, 4
The second display will outputs:
1, 1, 1, 5
As you can note in this examples, locals always have the
precedence and shared_variables has the precedence
over globals.
The same code would look like this using pug-php:
$pug = new Pug([
    'globals' => [
        'top' => 1,
        'right' => 1,
        'bottom' => 1,
        'left' => 1,
    ],
    'shared_variables' => [
        'right' => 2,
        'bottom' => 2,
        'left' => 2,
    ],
]);

// or $pug->setOptions([...])

$pug->share([
    'bottom' => 3,
    'left' => 3,
]);

$pug->display('=top + ", " + right + ", " + bottom + ", " + left', [
    'left' => 4,
]);

$pug->resetSharedVariables();

$pug->display('=top + ", " + right + ", " + bottom + ", " + left', [
    'left' => 5,
]);
cache_dir boolean | string
If set to true, compiled templates are cached. filename
must be set as the cache key (automatically done when using
renderFile or displayFile). Defaults to false.
This option can also be a directory path where cached files will be stored.
This option is automatically handled when you use framework adapters such as pug-symfony or laravel-pug.
pug-php also provide a cache alias for this option
to match pug-php 2 and pugjs options. It can also
provide a better semantic when using boolean value, and
cache_dir stay more appropriate when passing a string.
See compile-directory command to cache a whole directory.
We recommend to use this command when you deploy your
applications in production, it also allow you to set
the option up_to_date_check
to false and get better performance.
Language
paths array
Specify list of paths to be used for include and extend
with absolute paths. Example:
Phug::setOption('paths', [
  __DIR__.'/bundle-foo',
  __DIR__.'/resources/views',
]);

Phug::render('include /directory/file.pug');
As /directory/file.pug starts with a slash, it's considered
as an absolute path. Phug will first try to find it in the first
directory you specified: __DIR__.'/bundle-foo', if it does
not exist in it, it will search in the next
__DIR__.'/resources/views'.
extensions array
List of file extensions Phug will consider as pug files.
['', '.pug', '.jade'] by default.
This means:
//- my-file.pug
p Foo
// non-pug-file.js
alert('foo');
//- index.pug
//-
  my-file.pug can be imported (included or extended)
  with or without extension, and its content will be
  parsed as pug content.
  (cannot be tested in this live editor as includes
  are emulated)
include my-file.pug
//- include my-file
//-
  non-pug-file.js will be included as text
include non-pug-file.js
So the extensions extension allow you to pass an other
list of extensions to be handled by Phug and added
automatically to include/extend paths if missing.
default_doctype string
Doctype to use if not specified as argument.
"html" by default.
This means:
doctype
//- will automatically fallback to:
doctype html
default_tag string
By default, when you do not specify a tag name, Phug
fallback to a div tag:
.foo
#bar(a="b")
(c="d") Hello
The same code with Phug::setOption('default_tag', 'section')
would render as:
<section class="foo"></section>
<section id="bar" a="b"></section>
<section c="d">Hello</section>
attributes_mapping array
This option allow you to replace attributes by others:
Phug::setOption('attributes_mapping', [
  'foo' => 'bar',
  'bar' => 'foo',
  'biz' => 'zut',
]);
Phug::display('p(foo="1" bar="2" biz="3" zut="4" hop="5")');
Will output:
<p bar="1" foo="2" zut="3" zut="4" hop="5"></p>
Profiling
Phug embed a profiler module to watch, debug or limit memory consumption and execution time.
memory_limit integer
Set a memory limit usage. -1 by default would mean
no limit. But if the debug option is
true,
it automatically pass to 50*1024*1024 (50MB).
If the profiler detect the memory usage exceed the limit, it will throw an exception. But be aware, if this limit is greater than the machine limit or the PHP limit, the Phug limit will have no effect.
execution_max_time integer
Set an execution time limit. -1 by default would mean
no limit. But if the debug option is
true,
it automatically pass to 30*1000 (30 seconds).
If the profiler detect Phug is running for a longer time than the specified limit, it will throw an exception. But be aware, if this limit is greater than the PHP limit, the Phug limit will have no effect.
enable_profiler boolean
When set to true, it will output on render a timeline
you can inspect in your browser to see wich token/node
take longer to lex/parse/compile/render.
When enabled, it comes with a subset of options you can also edit, these are the default values:
'profiler' => [
    'time_precision' => 3,     // time decimal precision
    'line_height'    => 30,    // timeline height
    'display'        => true,  // output the result
                               // can be true or false
    'log'            => false, // log the result in a file
                               // can be a file path or false
],
detailed_dump boolean
The lexer, the parser and the compiler all have a ->dump()
method that allow you to see the state of each process.
By setting detailed_dump to true you can dump more
details (right now this option is only available for
the parser).
Errors
error_reporting callable | int
Allow to handle PHP errors display that comes up during the template execution. By default, errors raised by current PHP setting (see error_reporting) are turned into exception Phug is able to trace the origin in the template pug code. Other errors are hidden.
You can pass an custom error level that will override the PHP setting.
$renderer = new Renderer([
    'error_reporting' => E_ALL ^ E_NOTICE,
]);

$renderer->render('p=$foo["bar"]', ['foo' => []]);
// Outputs <p></p> since E_NOTICE are ignored

$renderer = new Renderer([
    'error_reporting' => E_ALL,
]);

$renderer->render('p=$foo["bar"]', ['foo' => []]);
// Throws an E_NOTICE error wrapped in Phug exception
You also can pass a callback for a finest handling:
$renderer = new Renderer([
    'error_reporting' => function ($number, $message, $file, $line) {
        if (strpos($message, 'hidden') !== false) {
            return null; // No errors displayed
        }

        if ($number === E_NOTICE) {
            return false; // Display the error in the template
        }

        // Stop the execution and throws an exception for any other error
        throw new \ErrorException($message, 0, $number, $file, $line);
    },
]);
error_handler callable
Set a callback method to handle Phug exceptions.
null by default.
html_error boolean
Display errors as HTML (by default, it's false when run
on CLI, true when run in browser).
color_support boolean
Used to enable color in CLI errors output, by default we will try to detect if the console used support colors.
error_context_lines integer
We give you some context on error code dump, 7 lines
above and below the error line by default. But you can
pass to this option any number to get more or less
context.
exit_on_error
When debug option is true, errors not handled will
quit the process using exit(1), to disable this behavior,
your can set the option exit_on_error to false.
Events
Events are a very useful way to intercept different process steps to get, change or manipulate objects and parameters.
Example:
$renderer = new \Phug\Renderer([
    'on_render' => function (\Phug\Renderer\Event\RenderEvent $event) {
        // Get current parameters
        $parameters = $event->getParameters();
        // If you pass laurel in your parameters
        if (isset($parameters['laurel'])) {
            // Then you will need hardy
            $parameters['hardy'] = '45 Minutes from Hollywood';
        }

        // Set new parameters
        $event->setParameters($parameters);
    },
]);

$renderer->display('p=$hardy', [
    'laurel' => true,
]);
Will output:
<p>45 Minutes from Hollywood</p>
The same works with pug-php:
$renderer = new Pug([
    'on_render' => function (\Phug\Renderer\Event\RenderEvent $event) {
        // Get new parameters
        $parameters = $event->getParameters();
        // If you pass laurel in your parameters
        if (isset($parameters['laurel'])) {
            // Then you will need hardy
            $parameters['hardy'] = '45 Minutes from Hollywood';
        }

        // Set new parameters
        $event->setParameters($parameters);
    },
]);

$renderer->display('p=hardy', [
    'laurel' => true,
]);
Note that all on_* options are initial options, it means
you cannot set them after renderer initialization or using the
facade (Phug::setOption() or Pug\Facade::setOption()).
However, you can attach/detach events this way (using facade or not):
function appendHardy(\Phug\Renderer\Event\RenderEvent $event) {
    // Get new parameters
    $parameters = $event->getParameters();
    // If you pass laurel in your parameters
    if (isset($parameters['laurel'])) {
        // Then you will need hardy
        $parameters['hardy'] = '45 Minutes from Hollywood';
    }

    // Set new parameters
    $event->setParameters($parameters);
}

Phug::attach(\Phug\RendererEvent::RENDER, 'appendHardy');

Phug::display('p=$hardy', [
    'laurel' => true,
]);

Phug::detach(\Phug\RendererEvent::RENDER, 'appendHardy');

Phug::display('p=$hardy', [
    'laurel' => true,
]);
Will output <p>45 Minutes from Hollywood</p> then <p></p>.
So for all the on_* options below, we will give you the initial option name, the event constant (to attach/detach) and the event class with a link to the API documentation that give you all methods available for this event (all values you can get and set).
Before listing all the events, here is a overview of the processes timeline:
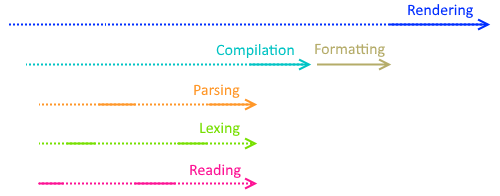
Plain lines are active process, dotted line are waiting for an other process.
So you can see the rendering start event will be triggered before other events even if the real active rendering process only start after all other processes end.
The same goes for compilation that first wait for the parser to give him the complete nodes tree before starting the active compilation, then it will wait for the formatting process before calling the output event.
Parsing, lexing and reading are parallel processes, the reader identify string chunk such as 2 spaces at the beginning of the line, the lexer convert this string into a indent token, then so parser know it have to enter one level and append next nodes as children of the upper node. Then this process is repeated token by token until all the input string is consumed.
on_render callable
Is triggered before a file or a string being rendered or displayed.
In some cases you may hesitate between on_render and on_compile, you should maybe check on_compile option.
Event constant: \Phug\RendererEvent::RENDER
Event type: \Phug\Renderer\Event\RenderEvent
Parameters you can get/set:
- input: input string if
render/displayhas been called - path: input file if
renderFile/displayFilehas been called - method: the method that have been called
"render","display","renderFile"or"displayFile". - parameters: local variables passed for the view rendering
on_html callable
Is triggered after a file or a string being rendered or displayed.
Event constant: \Phug\RendererEvent::HTML
Event type: \Phug\Renderer\Event\HtmlEvent
Parameters you can get/set:
- renderEvent: link to the initial RenderEvent (see above)
- result: returned result (by
renderorrenderFile) - buffer: output buffer (what
displayordisplayFileis about to display) typically the HTML code, but can be XML or any custom format implemented - error: the exception caught if an error occured
on_compile callable
Is triggered before a file or a string being compiled.
This option is different from on_render in the following points:
compile()andcompileFile()methods will trigger a compile event but not the render event,- compile event is triggered after the render event,
- and render and display methods will always trigger a render event but will trigger a compile event only except when compiled template is served from cache (cache settings in use and template up to date).
The compile process transform pug code into PHP code that is always the same for a given template no matter the locals values, when render process execute that PHP code to get HTML, XML or any final output with locals replaced with their values. That's why the render event also have parameters with locals variables values you can get and set.
Event constant: \Phug\CompilerEvent::COMPILE
Event type: \Phug\Compiler\Event\CompileEvent
Parameters you can get/set:
- input: input string/source file content
- path: input file if
compileFile/renderFile/displayFilehas been called
on_output callable
Is triggered after a file or a string being compiled.
Event constant: \Phug\CompilerEvent::OUTPUT
Event type: \Phug\Compiler\Event\OutputEvent
Parameters you can get/set:
- compileEvent: link to the initial CompileEvent (see above)
- output: output PHP code that can be executed to get the final output
on_node callable
Is triggered for each node before its compilation.
To well understand what is a node, you can use the parse mode of the live editor, here is an example:
doctype
html
  head
    title=$var
  body
    h1 Text
    footer
      | Text
      =date('Y')
You can see the Phug parser transform the pug code into a tree of nodes. Then the compiler will compile each of these nodes into elements recursively. And the formatter will turn the tree of elements into the compiled PHP code.
Event constant: \Phug\CompilerEvent::NODE
Event type: \Phug\Compiler\Event\NodeEvent
Parameters you can get/set:
- node: the node instance created by the parser that is about to be compiled
on_element callable
Is triggered for each node after its compilation.
Event constant: \Phug\CompilerEvent::ELEMENT
Event type: \Phug\Compiler\Event\ElementEvent
Parameters you can get/set:
- nodeEvent: link to the initial NodeEvent (see above)
- element: the compiled element
on_format callable
Is triggered for each element before being formatted.
The formatting step is a process that take elements tree (output object representation as stored after the compilation, not to be confused with the nodes tree that represent the input and is given by the parsing before the compilation) and convert these elements into a compiled PHP capable to render them.
The formatting is recursive, when passing an element, it also format its children inside.
Before formatting process
p=$var
After formatting process
p=$var
Event constant: \Phug\FormatterEvent::FORMAT
Event type: \Phug\Formatter\Event\FormatEvent
Parameters you can get/set:
- element: the compiled element (implements ElementInterface)
- format: the format in use (implements FormatInterface)
will be by default BasicFormat or the format set for your
doctype (for example, if you have set
doctype html) the format here is HtmlFormat (see format and default_format options)
on_stringify callable
Is triggered for each element after being formatted.
Event constant: \Phug\FormatterEvent::STRINGIFY
Event type: \Phug\Formatter\Event\StringifyEvent
Parameter you can get/set:
- output: output string (HTML and PHP code) Parameter you can get:
- formatEvent: reference to the source format event
(
FormatEvent), modifying properties on this event will have no effect has it has already been triggered.
on_new_format callable
Is triggered when the format change (for example when you set the doctype).
Event constant: \Phug\FormatterEvent::NEW_FORMAT
Event type: \Phug\Formatter\Event\NewFormatEvent
Parameters you can get/set:
- formatter: the current formatter in use (implements Formatter)
- format: the new format instance (implements FormatInterface)
on_dependency_storage callable
Is triggered when a dependency is retrieved from the dependency storage.
Dependency storage is used to store functions needed at rendering time and dump them in the compiled PHP code, it's used for example in assignments:
p&attributes(['foo' => 'bar'])
Those methods are stored by default in $pugModule (see
dependencies_storage option
to change it).
Event constant: \Phug\FormatterEvent::DEPENDENCY_STORAGE
Event type: \Phug\Formatter\Event\DependencyStorageEvent
Parameters you can get/set:
- dependencyStorage: storage variable as string (for example:
$pugModule['Phug\\Formatter\\Format\\BasicFormat::attributes_assignment'])
on_parse callable
Is triggered before the parsing process.
Event constant: \Phug\ParserEvent::PARSE
Event type: \Phug\Parser\Event\ParseEvent
Parameters you can get/set:
- input: input string/source file content
- path: input file if
compileFile/renderFile/displayFilehas been called - stateClassName: class name of the state object that is about be created for parsing
- stateOptions: options array that will be passed to the sate at its creation
on_document callable
Is triggered when the parser finished to parse a whole document.
Event constant: \Phug\ParserEvent::DOCUMENT
Event type: \Phug\Parser\Event\NodeEvent
Parameters you can get/set:
- node: the document as parser node instance
on_state_enter callable
Is triggered when the parser enter a node.
Event constant: \Phug\ParserEvent::STATE_ENTER
Event type: \Phug\Parser\Event\NodeEvent
Parameters you can get/set:
- node: the node the parser entered in
on_state_leave callable
Is triggered when the parser leave a node.
Event constant: \Phug\ParserEvent::STATE_LEAVE
Event type: \Phug\Parser\Event\NodeEvent
Parameters you can get/set:
- node: the node the parser left out
on_state_store callable
Is triggered when the parser store and append a node to the document tree.
Event constant: \Phug\ParserEvent::STATE_STORE
Event type: \Phug\Parser\Event\NodeEvent
Parameters you can get/set:
- node: the node the parser stored
on_lex callable
Is triggered when the lexer starts to tokenize an input string.
Event constant: \Phug\LexerEvent::LEX
Event type: \Phug\Lexer\Event\LexEvent
Parameters you can get/set:
- input: input string/source file content
- path: input file if
compileFile/renderFile/displayFilehas been called - stateClassName: class name of the state object that is about be created for lexing
- stateOptions: options array that will be passed to the sate at its creation
on_lex_end callable
Is triggered when the lexer finished to tokenize an input string.
Event constant: \Phug\LexerEvent::LEX_END
Event type: \Phug\Lexer\Event\EndLexEvent
Parameters you can get/set:
- lexEvent: link to the initial LexEvent
on_token callable
Is triggered each time the lexer is about to yield a token and send it to the parser.
Event constant: \Phug\LexerEvent::TOKEN
Event type: \Phug\Lexer\Event\TokenEvent
Parameters you can get/set:
- token: the token created by the lexer
- tokenGenerator: is null by default, but if you set an iterator for this property, it will replace the token
Some examples:
$renderer = new \Phug\Renderer([
  'on_token' => function (\Phug\Lexer\Event\TokenEvent $event) {
    $token = $event->getToken();
    if ($token instanceof \Phug\Lexer\Token\TagToken) {
      $token->setName('a');
    }
  },
]);
$renderer->display('div'); // <a></a>

$renderer = new \Phug\Renderer([
  'on_token' => function (\Phug\Lexer\Event\TokenEvent $event) {
    if ($event->getToken() instanceof \Phug\Lexer\Token\TagToken) {
      $text = new \Phug\Lexer\Token\TextToken();
      $text->setValue('Hello');
      $event->setToken($text);
    }
  },
]);
$renderer->display('div'); // Hello

$renderer = new \Phug\Renderer([
  'on_token' => function (\Phug\Lexer\Event\TokenEvent $event) {
    if ($event->getToken() instanceof \Phug\Lexer\Token\TextToken) {
      $event->setTokenGenerator(new \ArrayIterator([
        (new \Phug\Lexer\Token\TagToken())->setName('div'),
        (new \Phug\Lexer\Token\ClassToken())->setName('foo'),
        (new \Phug\Lexer\Token\IdToken())->setName('bar'),
      ]));
    }
  },
]);
$renderer->display('| Hello'); // <div id="bar" class="foo"></div>

function replaceTextToken(\Phug\Lexer\Token\TextToken $token) {
  if (preg_match('/^(\D+)(\d+)$/', $token->getValue(), $match) {
    list(, $chars, $digit) = $match;
    for ($i = 0; $i < $digit; $i++) {
      yield (new \Phug\Lexer\Token\TagToken())->setName($chars);
    }
  }
}

$renderer = new \Phug\Renderer([
  'on_token' => function (\Phug\Lexer\Event\TokenEvent $event) {
    $token = $event->getToken();
    if ($token instanceof \Phug\Lexer\Token\TextToken) {
      $event->setTokenGenerator(replaceTextToken($token));
    }
  },
]);
$renderer->display("|i2\n|bk3"); // <i></i><i></i><bk></bk><bk></bk><bk></bk>
Add-ons
Here are a list of entry points to add contents and custom behaviors:
macros array
macros option or the macro method allow you to add methods
on both Phug facade and Phug\Renderer instances (and if
you use Pug-php, it also add them to the Pug\Facade
facade and Pug instances).
Phug::macro('displayMessage', function ($message) {
  static::display('p=$message', [
    'message' => $message,
  ]);
});

Phug::displayMessage('Hello');
This will display:
<p>Hello</p>
Or an example with the option syntax:
Phug::setOption('macros', [
  'getOne' => function () {
    return 1;
  },
  'getTwo' => function () {
    return 2;
  },
]);

echo Phug::getOne() + Phug::getTwo();
Outputs: 3.
modules array
Modules can add anything else by manipulating options and events. For example if you use Pug-php with default options, you already have the js-phpize module for Phug enabled. This would be equivalent to require it with composer and add it this way to Phug:
$renderer = new \Phug\Renderer([
    'modules' => [
        \JsPhpize\JsPhpizePhug::class,
    ],
]);

$renderer->display('p=userName.substr(0, 3)', [
    'userName' => 'Bobby',
]);
This code output <p>Bob</p> but it would failed without
the module added because JS expressions are not
natively handled.
You also can create your own module by extending one of the following class:
\Phug\AbstractRendererModule\Phug\AbstractCompilerModule\Phug\AbstractFormatterModule\Phug\AbstractParserModule\Phug\AbstractLexerModule
They all extend the
\Phug\Util\AbstractModule class
Here is an example:
class MyModule extends \Phug\AbstractCompilerModule
{
    public function __construct(\Phug\Util\ModuleContainerInterface $container)
    {
        // Here you can change some options
        $container->setOption('default_tag', 'p');

        parent::__construct($container);
    }

    public function getEventListeners()
    {
        // Here you can attach some events
        return [
            \Phug\CompilerEvent::NODE => function (\Phug\Compiler\Event\NodeEvent $event) {
                // Do something before compiling a node
                $node = $event->getNode();
                if ($node instanceof \Phug\Parser\Node\MixinNode) {
                    $tag = new \Phug\Parser\Node\ElementNode(
                        $event->getNode()->getToken()
                    );
                    $attribute = new \Phug\Parser\Node\AttributeNode();
                    $attribute->setName('mixin');
                    $attribute->setValue('"'.$node->getName().'"');
                    $tag->getAttributes()->attach($attribute);
                    $event->setNode($tag);
                }
            },
        ];
    }
}

$renderer = new \Phug\Renderer([
    'modules' => [
        MyModule::class,
    ],
]);

$renderer->display('mixin foo()');
This will output:
<p mixin="foo"></p>
Modules are dispatched to the renderer/compiler/formatter/parser/lexer according to the interface implemented (or the abstract module class extended).
But you can specify explicitly a target with following options:
compiler_modules array
Modules reserved to the compiler (see modules).
formatter_modules array
Modules reserved to the formatter (see modules).
parser_modules array
Modules reserved to the parser (see modules).
lexer_modules array
Modules reserved to the lexer (see modules).
includes array
It simply includes pug files before each compilation:
// Add to previous includes to avoid erase existing includes if any
Phug::setOption('includes', Phug::getOption('includes') + [
    'mixins.pug',
]);

Phug::display('+foo()');
If the file mixins.pug contains a foo mixin declaration,
this code will properly call it.
It's a good way to make a mixins library available in any template.
filter_resolvers array
Set a dynamic way to resolve a filter by name when not found.
Phug::setOption('filter_resolvers', Phug::getOption('filter_resolvers') + [
    function ($name) {
        if (mb_substr($name, 0, 3) === 'go-') {
            return function ($content) use ($name) {
                return '<a href="'.mb_substr($name, 3).'">'.$content.'</a>';
            };
        }
    },
]);

Phug::display(':go-page');
// <a href="page"></a>
Phug::display(':go-action Action');
// <a href="action">Action</a>
The resolver is used only if the given filter name does not exists and if previous resolver did return nothing. If no resolver return anything, then an Unknown filter error is thrown.
keywords array
Allow you to create your own custom language keywords:
Phug::setOption('keywords', Phug::getOption('keywords') + [
    'myKeyword' => function ($value, \Phug\Formatter\Element\KeywordElement $element, $name) {
        $nodes = isset($element->nodes) ? count($element->nodes) : 0;

        return "This is a $name keyword with $value value and $nodes children.";
    },
]);


Phug::display('
div
  myKeyword myValue
    span 1
    span 2
');
Display:
<div>This is a myKeyword keyword with myValue value and 2 children.</div>
When the keyword callback returns a string, it replaces the whole keyword with its children.
But you can also return an array with begin and end that will preserves the children nodes:
Phug::setOption('keywords', Phug::getOption('keywords') + [
    'foo' => function ($value) {
        return [
            'begin' => '<div class="'.$value.'">',
            'end'   => '</div>',
        ];
    },
]);


Phug::display('
myKeyword myValue
  span 1
  span 2
');
Display:
<div class="myValue">
  <span>1</span>
  <span>2</span>
</div>
Or you can specify an array with beginPhp and endPhp to
wrap children with a begin string and an end string both
wrapped themselves in <?php ?>.
Phug::setOption('keywords', Phug::getOption('keywords') + [
    'repeat' => function ($value) {
        return [
            'beginPhp' => 'for ($i = 0; $i < '.$value.'; $i++) {',
            'endPhp'   => '}',
        ];
    },
]);


Phug::display('
repeat 3
  section
');
Display:
<section></section>
<section></section>
<section></section>
php_token_handlers array
This setting allow you to intercept
any PHP token
and replace it with an other string of PHP code.
It also works with expressions inside each loop,
if statements, etc. and even if the expression come from
a translation. For example, if you
use js-phpize
](#utiliser-des-expressions-javascript)
and write a(href=route('profile', {id: 3})), then
{id: 3} is converted to array('id' => 3) and
the array( token can be intercepted with its
PHP identifier T_ARRAY.
Phug::setOption('php_token_handlers', [
    T_DNUMBER => 'round(%s)',
]);

Phug::display('
- $floatingNumber = 9.54
- $text = "9.45"
strong=$floatingNumber
| !=
strong=$text
');
Output:
<strong>10</strong>!=<strong>9.45</strong>
If you pass a string,
sprintf
is used to handle it, so if it contains %s, it will be
replaced with the input token string.
You can also use a callback function:
Phug::setOption('php_token_handlers', [
    '(' => function ($tokenString, $index, $tokens, $checked, $formatInstance) {
        return '__call_something('.mt_rand(0, 4).', ';
    },
]);

echo Phug::compile('b=($variable)');
This will call the callback function for each ( token found in
an expression and replace it with the result returned by the
function (for example __call_something(2, ).
This callback function receives 5 arguments:
$tokenStringis the input token as string;$indexis the position of the token in the expression;&$tokensis an array with all tokens of the expression, it is passed by reference, it means you can modify/add/remove tokens from it (will works only for tokens come after the current token handled);$checkedis the check flag of the expression (=exp()is checked,?=exp()is not checked);$formatInstancethe format instance that format the current expression (implements FormatInterface).
Be careful, we use php_token_handlers to handle checked
expressions. It means you can replace the T_VARIABLE PHP
token handler with your own like in the example below:
Phug::setOption('php_token_handlers', [
    T_VARIABLE => function ($variable) {
        if (mb_substr($variable, 0, 5) === '$env_') {
            return '$_'.strtoupper(mb_substr($variable, 5));
        }

        return $variable;
    },
]);

Phug::display('
b=$normalVariable
i=$env_super["METHOD"]
', [
    'normalVariable' => 'foo',
    '_SUPER' => [
        'METHOD' => 'bar',
    ],
]);
Output:
<b>foo</b><i>bar</i>
But if you do, it erase the initial checked expressions handling:
Phug::display('p=$missing'); // output <p></p>

Phug::setOption('php_token_handlers', [
    T_VARIABLE => function ($variable) {
        return $variable;
    },
]);

Phug::display('p=$missing'); // Throw: Undefined variable: missing
But you still can recall the native variable handler before or after your own treatments:
Phug::setOption('php_token_handlers', [
    T_VARIABLE => function ($tokenString, $index, $tokens, $checked, $formatInstance) {
        // Do something before the check process
        $tokenString .= 'Suffix';
        // Do the check process:
        $tokenString = $formatInstance->handleVariable($tokenString, $index, $tokens, $checked);
        // Do something after the check process
        $tokenString = 'strtoupper('.$tokenString.')';

        return $tokenString;
    },
]);

Phug::display('p=$foo', [
    'fooSuffix' => 'bar',
]);
Output:
<p>BAR</p>
Mixins
mixin_keyword
Determine the start keyword of mixin declaration.
Value by default: "mixin"
It can be changed for an other string or an array to allow multiple keywords such as: ["mixin", "component"]
String can contain regular expression, it means you can use [a-z] to identify lower letter, \d for digit etc.
but it also means you need to escape special characters such as []?!.{}()^$/ if you want to use them as text.
mixin_call_keyword
Determine the start keyword of mixin call.
Value by default: "\\+"
It can be changed for an other string or an array to allow multiple keywords such as: ["\\+", "@"]
String can contain regular expression, it means you can use [a-z] to identify lower letter, \d for digit etc.
but it also means you need to escape special characters such as []?!.{}()^$/ if you want to use them as text.
mixin_merge_mode string
Alias of allowMixinOverride in Pug-php.
It determines if a new mixin declaration with an existing name will replace the previous one or be ignored:
Phug::setOption('mixin_merge_mode', 'replace');

Phug::display('
mixin foo
  p A

mixin foo
  p B

+foo
');

// Output <p>B</p>

Phug::setOption('mixin_merge_mode', 'ignore');

Phug::display('
mixin foo
  p A

mixin foo
  p B

+foo
');

// Output <p>A</p>
This option is set to "replace" by default.
Formatting
patterns array
Defines how to dump specific parts of elements in PHP.
Default value:
[
  'class_attribute'        => '(is_array($_pug_temp = %s) ? implode(" ", $_pug_temp) : strval($_pug_temp))',
  'string_attribute'       => '
        (is_array($_pug_temp = %s) || is_object($_pug_temp) && !method_exists($_pug_temp, "__toString")
            ? json_encode($_pug_temp)
            : strval($_pug_temp))',
  'expression_in_text'     => '(is_bool($_pug_temp = %s) ? var_export($_pug_temp, true) : $_pug_temp)',
  'html_expression_escape' => 'htmlspecialchars(%s)',
  'html_text_escape'       => 'htmlspecialchars',
  'pair_tag'               => '%s%s%s',
  'transform_expression'   => '%s',
  'transform_code'         => '%s',
  'transform_raw_code'     => '%s',
  'php_handle_code'        => '<?php %s ?>',
  'php_display_code'       => '<?= %s ?>',
  'php_block_code'         => ' {%s}',
  'php_nested_html'        => ' ?>%s<?php ',
  'display_comment'        => '<!-- %s -->',
  'doctype'                => '<!DOCTYPE %s PUBLIC "%s" "%s">',
  'custom_doctype'         => '<!DOCTYPE %s>',
  'debug_comment'          => "\n// PUG_DEBUG:%s\n",
  'debug'                  => function ($nodeId) {
    return $this->handleCode($this->getDebugComment($nodeId));
  },
]
Formats can add patterns (like XmlFormat):
class XmlFormat extends AbstractFormat
{
    //...

    const DOCTYPE = '<?xml version="1.0" encoding="utf-8" ?>';
    const OPEN_PAIR_TAG = '<%s>';
    const CLOSE_PAIR_TAG = '</%s>';
    const SELF_CLOSING_TAG = '<%s />';
    const ATTRIBUTE_PATTERN = ' %s="%s"';
    const BOOLEAN_ATTRIBUTE_PATTERN = ' %s="%s"';
    const BUFFER_VARIABLE = '$__value';

    public function __construct(Formatter $formatter = null)
    {
        //...

        $this->addPatterns([
            'open_pair_tag'             => static::OPEN_PAIR_TAG,
            'close_pair_tag'            => static::CLOSE_PAIR_TAG,
            'self_closing_tag'          => static::SELF_CLOSING_TAG,
            'attribute_pattern'         => static::ATTRIBUTE_PATTERN,
            'boolean_attribute_pattern' => static::BOOLEAN_ATTRIBUTE_PATTERN,
            'save_value'                => static::SAVE_VALUE,
            'buffer_variable'           => static::BUFFER_VARIABLE,
        ])
For example, you can see BOOLEAN_ATTRIBUTE_PATTERN = ' %s="%s"'
which mean input(checked) become <input checked="checked">.
And HtmlFormat override it:
class HtmlFormat extends XhtmlFormat
{
    const DOCTYPE = '<!DOCTYPE html>';
    const SELF_CLOSING_TAG = '<%s>';
    const EXPLICIT_CLOSING_TAG = '<%s/>';
    const BOOLEAN_ATTRIBUTE_PATTERN = ' %s';

    public function __construct(Formatter $formatter = null)
    {
        parent::__construct($formatter);

        $this->addPattern('explicit_closing_tag', static::EXPLICIT_CLOSING_TAG);
    }
}
BOOLEAN_ATTRIBUTE_PATTERN = ' %s' so input(checked)
become <input checked>.
The same way you can extend a format to create your own custom format and override it with formats and default_format options.
Patterns can be strings where %s is replaced with the input
or callback functions receiving the input as argument.
Some patterns have multiple input (like pair_tag which takes
$open, $content and $close).
Usage example: you can intercept and modify expressions:
Phug::setOption('patterns', [
  'transform_expression' => 'strtoupper(%s)',
]);

Phug::display('p="AbcD"'); // Output <p>ABCD</p>
Or you can use a custom escape function:
Phug::setOption('patterns', [
  'html_expression_escape' => 'htmlentities(%s)',
  'html_text_escape'       => 'htmlentities',
]);
pattern callable
The pattern option is the way patterns are handled.
Default value :
function ($pattern) {
  $args = func_get_args();
  $function = 'sprintf';
  if (is_callable($pattern)) {
    $function = $pattern;
    $args = array_slice($args, 1);
  }

  return call_user_func_array($function, $args);
}
This function will take at least one argument (the pattern) and as many values as needed for this pattern will come as rest arguments.
You can see in the default behavior that if the pattern
is callable, we simply call it with input values:
$pattern($value1, $value2, ...), else
we call sprintf($pattern, $value1, $value2, ...)
By changing the pattern option, you can handle patterns
in the way you want and support any other pattern types.
formats array
Array of format classes by doctype, default value is:
[
  'basic'        => \Phug\Formatter\Format\BasicFormat::class,
  'frameset'     => \Phug\Formatter\Format\FramesetFormat::class,
  'html'         => \Phug\Formatter\Format\HtmlFormat::class,
  'mobile'       => \Phug\Formatter\Format\MobileFormat::class,
  '1.1'          => \Phug\Formatter\Format\OneDotOneFormat::class,
  'plist'        => \Phug\Formatter\Format\PlistFormat::class,
  'strict'       => \Phug\Formatter\Format\StrictFormat::class,
  'transitional' => \Phug\Formatter\Format\TransitionalFormat::class,
  'xml'          => \Phug\Formatter\Format\XmlFormat::class,
]
You can add/modify/remove any format by doctype:
class FooFormat extends \Phug\Formatter\Format\HtmlFormat
{
    const DOCTYPE = '#FOO';
    // Here you can change options/methods/patterns
}

Phug::setOption('formats', [
    'foo' => FooFormat::class,
] + Phug::getOption('formats'));
// Add foo but keep Phug::getOption('formats')
// So both array will be merged

Phug::display('
doctype foo
test
');

// Output #FOO<test></test>
You can also remove a format this way:
$formats = Phug::getOption('formats');
unset($formats['xml']); // remove custom XML format

Phug::setOption('formats', $formats);

Phug::display('
doctype xml
test
');

// Output <!DOCTYPE xml><test></test>
// Instead of <?xml version="1.0" encoding="utf-8" ?><test></test>
default_format string
It's the format used when there is no doctype;
\Phug\Formatter\Format\BasicFormat::class by default.
$renderer = new \Phug\Renderer([
  'default_format' => \Phug\Formatter\Format\XmlFormat::class,
]);
$renderer->display('input'); // <input></input>

$renderer = new \Phug\Renderer([
  'default_format' => \Phug\Formatter\Format\HtmlFormat::class,
]);
$renderer->display('input'); // <input>
dependencies_storage string
Variable name that will contain dependencies in the
compiled PHP code; "pugModule" by default.
formatter_class_name string
Allow you to extend the Formatter class
class CustomFormatter extends \Phug\Formatter
{
    public function format(\Phug\Formatter\ElementInterface $element, $format = null)
    {
        // Add a space everywhere
        return parent::format($element, $format).' ';
    }
}

Phug::display('
span foo
span bar
');

// <span>foo</span><span>bar</span>

$renderer = new Phug\Renderer([
    'formatter_class_name' => CustomFormatter::class,
]);

$renderer->display('
span foo
span bar
');

// <span>foo </span> <span>bar </span>
Rendering
scope_each_variables boolean | string
By default (false value), key and value variables created by each ... in or for ... in
loops are scoped (since phug/compiler 0.5.26).
- $val = 'a'
- $key = 'b'
each $val, $key in ['X', 'Y', 'Z']
  p= $key . $val
div= $key . $val
With scope_each_variables set to false, the used key and value variables used in each/for
will simply erase the global one:
- $val = 'a'
- $key = 'b'
each $val, $key in ['X', 'Y', 'Z']
  p= $key . $val
div= $key . $val
scope_each_variables option use internally a $__eachScopeVariables variable to store
the iteration variables (value and optionally key) name and values they had before the loop
to restore them after the loop.
You can also pass a string to scope_each_variables to choose the variable name,
for example with 'scope_each_variables' => 'beforeEach':
- $val = 'a'
- $key = 'b'
each $val, $key in ['X', 'Y', 'Z']
  p= $beforeEach['key'] . $beforeEach['val']
div= $key . $val
adapter_class_name string
This option need the adapter to be reinitialized to be
taken into account. So you can use it as an initial option
(passed as options array when you construct a new
Renderer instance or a new Pug instance if you use Pug-php)
else you can simply use the
->setAdapterClassName() method
to change this option and reinitialize the adapter.
Phug::getRenderer()->setAdapterClassName(\Phug\Renderer\Adapter\StreamAdapter::class);
// Phug::getRenderer()->getAdapter() instanceof \Phug\Renderer\Adapter\StreamAdapter
There are 3 adapters available and you can create your own by extending one of them or the AbstractAdapter class.
The adapter role is to take formatted compiled code and turn it into the final rendered code. So most often it means execute PHP code to get HTML code.
FileAdapter
FileAdapter
is the only adapter to implement
CacheInterface
so when you enable or use any cache feature, this adapter
is automatically selected if the current adapter does not
implement CacheInterface. ->display() with the
FileAdapter is equivalent to:
file_put_contents('file.php', $phpCode);
include 'file.php';
EvalAdapter
EvalAdapter
is the default adapter and uses
eval.
You may have heard that eval is dangerous. And yes,
if you don't filter user/external input the string you
pass to eval may contain, this is unsafe. But this
does not happen when you render a template.
Your local/global variables are never executed, only
the Pug code converted in PHP code is, so if you
do not write dangerous code in your Pug code, there
is nothing dangerous in the final PHP code.
This is perfectly as safe as the 2 other adapters,
you will always get the exact same executions and
results no matter which adapter is used.
Take a look at the following:
p?!=$dangerousContent
[
'dangerousContent' => 'file_get_contents("index.php")',
]
As you see, variables can contain anything and be display in any way, it will not be evaluated by PHP, only displayed. Danger only appears if you write it down directly in your Pug template, so it's the same danger than in any template engine or if you would have written it directly in your PHP files.
EvalAdapter is the faster and easier to setup way
as well. In this mode ->display() is
equivalent to:
eval('?>'.$phpCode);
StreamAdapter
StreamAdapter
Stream is an alternative between both. In this
mode ->display() is equivalent to:
include 'pug.stream://data;'.$phpCode;
Stream have some constraints. The stream size is limited by the RAM memory. And server config (like php.ini) can disallow stream inclusion.
stream_name string
Default to "pug". It determines the stream name
when you use the stream adapter (see above).
stream_suffix string
Default to ".stream". It determines the stream suffix
when you use the stream adapter (see above).
File system
tmp_dir string
The directory to use to store temporary files.
sys_get_temp_dir() by default.
tempnam callable
The function to use to create a temporary file.
"tempnam" by default.
get_file_contents callable
The function to use to get file contents.
"file_get_contents" by default.
$storage = new Memcached();
$storage->addServer('localhost', 11211);
Phug::setOption('get_file_contents', function ($path) use ($storage) {
return $storage->get($path);
});
In this example, instead of searching templates (rendered, included or extended) in the file matching the path, we search it in a Memcached storage.
up_to_date_check boolean
true by default, when set to false, cache files
never expire until a manual cache clear.
keep_base_name boolean
If true, it will prepend template name to cache
file name. It can be useful to debug if you need
to see quickly which template a cache file come
from.
locator_class_name string
The locator is used by the compiler to locate files to compile/include/extend.
By default we use FileLocator.
But you can change it for any class that implement LocatorInterface.
Lexing
Lexing options are handled and altered by the lexer at very low process level. There are no particular interest to change (except encoding) them but getting them at some events can be interesting:
$lexer = Phug::getRenderer()->getCompiler()->getParser()->getLexer();
$lexer->attach(\Phug\LexerEvent::TOKEN, function (\Phug\Lexer\Event\TokenEvent $event) use ($lexer, &$output) {
$state = $lexer->getState();
$state->getLevel(); // level
$state->getIndentStyle(); // indent_style
$state->getIndentWidth(); // indent_width
$state->getReader()->getEncoding(); // encoding
});
Warning: do not confuse options below with formatting options, the options below have no effect on the output, they are how the lexer get the input.
level integer
Count of indentation spaces/tabs.
indent_style string
Indentation string (spaces, tabs or any custom string).
indent_width indent_width
Number strings occurrences to step an indentation.
allow_mixed_indent integer
true by default. If set to false, mixin tabs
and spaces throw an exception.
encoding string
Encoding of the input ("UTF-8" by default).
Extending core classes
Core classes can be replaced thanks to options. This allow you to extend Phug classes and methods. These options are initial, so you have to reset/recreate the renderer if you want to change them after a render.
compiler_class_name string
Allow to replace Compiler
parser_class_name string
Allow to replace Parser
lexer_class_name string
Allow to replace Lexer
lexer_class_name string
Allow to replace Lexer
lexer_state_class_name string
Allow to replace the lexer state class
parser_state_class_name string
Allow to replace the parser state class
node_compilers array
Allow to change compilers for each kind of node, the default map is:
[
\Phug\Parser\Node\AssignmentListNode::class => \Phug\Compiler\NodeCompiler\AssignmentListNodeCompiler::class,
\Phug\Parser\Node\AssignmentNode::class => \Phug\Compiler\NodeCompiler\AssignmentNodeCompiler::class,
\Phug\Parser\Node\AttributeListNode::class => \Phug\Compiler\NodeCompiler\AttributeListNodeCompiler::class,
\Phug\Parser\Node\AttributeListNode::class => \Phug\Compiler\NodeCompiler\AttributeNodeCompiler::class,
\Phug\Parser\Node\BlockNode::class => \Phug\Compiler\NodeCompiler\BlockNodeCompiler::class,
\Phug\Parser\Node\YieldNode::class => \Phug\Compiler\NodeCompiler\YieldNodeCompiler::class,
\Phug\Parser\Node\CaseNode::class => \Phug\Compiler\NodeCompiler\CaseNodeCompiler::class,
\Phug\Parser\Node\CodeNode::class => \Phug\Compiler\NodeCompiler\CodeNodeCompiler::class,
\Phug\Parser\Node\CommentNode::class => \Phug\Compiler\NodeCompiler\CommentNodeCompiler::class,
\Phug\Parser\Node\ConditionalNode::class => \Phug\Compiler\NodeCompiler\ConditionalNodeCompiler::class,
\Phug\Parser\Node\DoctypeNode::class => \Phug\Compiler\NodeCompiler\DoctypeNodeCompiler::class,
\Phug\Parser\Node\DocumentNode::class => \Phug\Compiler\NodeCompiler\DocumentNodeCompiler::class,
\Phug\Parser\Node\DoNode::class => \Phug\Compiler\NodeCompiler\DoNodeCompiler::class,
\Phug\Parser\Node\EachNode::class => \Phug\Compiler\NodeCompiler\EachNodeCompiler::class,
\Phug\Parser\Node\KeywordNode::class => \Phug\Compiler\NodeCompiler\KeywordNodeCompiler::class,
\Phug\Parser\Node\ElementNode::class => \Phug\Compiler\NodeCompiler\ElementNodeCompiler::class,
\Phug\Parser\Node\ExpressionNode::class => \Phug\Compiler\NodeCompiler\ExpressionNodeCompiler::class,
\Phug\Parser\Node\FilterNode::class => \Phug\Compiler\NodeCompiler\FilterNodeCompiler::class,
\Phug\Parser\Node\ForNode::class => \Phug\Compiler\NodeCompiler\ForNodeCompiler::class,
\Phug\Parser\Node\ImportNode::class => \Phug\Compiler\NodeCompiler\ImportNodeCompiler::class,
\Phug\Parser\Node\MixinCallNode::class => \Phug\Compiler\NodeCompiler\MixinCallNodeCompiler::class,
\Phug\Parser\Node\MixinNode::class => \Phug\Compiler\NodeCompiler\MixinNodeCompiler::class,
\Phug\Parser\Node\TextNode::class => \Phug\Compiler\NodeCompiler\TextNodeCompiler::class,
\Phug\Parser\Node\VariableNode::class => \Phug\Compiler\NodeCompiler\VariableNodeCompiler::class,
\Phug\Parser\Node\WhenNode::class => \Phug\Compiler\NodeCompiler\WhenNodeCompiler::class,
\Phug\Parser\Node\WhileNode::class => \Phug\Compiler\NodeCompiler\WhileNodeCompiler::class,
]
element_handlers array
Allow to change how to format each kind of element, the default map is:
[
\Phug\Formatter\Element\AssignmentElement::class => [$this, 'formatAssignmentElement'],
\Phug\Formatter\Element\AttributeElement::class => [$this, 'formatAttributeElement'],
\Phug\Formatter\Element\CodeElement::class => [$this, 'formatCodeElement'],
\Phug\Formatter\Element\CommentElement::class => [$this, 'formatCommentElement'],
\Phug\Formatter\Element\ExpressionElement::class => [$this, 'formatExpressionElement'],
\Phug\Formatter\Element\DoctypeElement::class => [$this, 'formatDoctypeElement'],
\Phug\Formatter\Element\DocumentElement::class => [$this, 'formatDocumentElement'],
\Phug\Formatter\Element\KeywordElement::class => [$this, 'formatKeywordElement'],
\Phug\Formatter\Element\MarkupElement::class => [$this, 'formatMarkupElement'],
\Phug\Formatter\Element\MixinCallElement::class => [$this, 'formatMixinCallElement'],
\Phug\Formatter\Element\MixinElement::class => [$this, 'formatMixinElement'],
\Phug\Formatter\Element\TextElement::class => [$this, 'formatTextElement'],
\Phug\Formatter\Element\VariableElement::class => [$this, 'formatVariableElement'],
]
Where $this is the current format instance.
token_handlers array
Allow to change how lexer token are parsed, the default map is:
[
\Phug\Lexer\Token\AssignmentToken::class => \Phug\Parser\TokenHandler\AssignmentTokenHandler::class,
\Phug\Lexer\Token\AttributeEndToken::class => \Phug\Parser\TokenHandler\AttributeEndTokenHandler::class,
\Phug\Lexer\Token\AttributeStartToken::class => \Phug\Parser\TokenHandler\AttributeStartTokenHandler::class,
\Phug\Lexer\Token\AttributeToken::class => \Phug\Parser\TokenHandler\AttributeTokenHandler::class,
\Phug\Lexer\Token\AutoCloseToken::class => \Phug\Parser\TokenHandler\AutoCloseTokenHandler::class,
\Phug\Lexer\Token\BlockToken::class => \Phug\Parser\TokenHandler\BlockTokenHandler::class,
\Phug\Lexer\Token\YieldToken::class => \Phug\Parser\TokenHandler\YieldTokenHandler::class,
\Phug\Lexer\Token\CaseToken::class => \Phug\Parser\TokenHandler\CaseTokenHandler::class,
\Phug\Lexer\Token\ClassToken::class => \Phug\Parser\TokenHandler\ClassTokenHandler::class,
\Phug\Lexer\Token\CodeToken::class => \Phug\Parser\TokenHandler\CodeTokenHandler::class,
\Phug\Lexer\Token\CommentToken::class => \Phug\Parser\TokenHandler\CommentTokenHandler::class,
\Phug\Lexer\Token\ConditionalToken::class => \Phug\Parser\TokenHandler\ConditionalTokenHandler::class,
\Phug\Lexer\Token\DoToken::class => \Phug\Parser\TokenHandler\DoTokenHandler::class,
\Phug\Lexer\Token\DoctypeToken::class => \Phug\Parser\TokenHandler\DoctypeTokenHandler::class,
\Phug\Lexer\Token\EachToken::class => \Phug\Parser\TokenHandler\EachTokenHandler::class,
\Phug\Lexer\Token\ExpansionToken::class => \Phug\Parser\TokenHandler\ExpansionTokenHandler::class,
\Phug\Lexer\Token\ExpressionToken::class => \Phug\Parser\TokenHandler\ExpressionTokenHandler::class,
\Phug\Lexer\Token\FilterToken::class => \Phug\Parser\TokenHandler\FilterTokenHandler::class,
\Phug\Lexer\Token\ForToken::class => \Phug\Parser\TokenHandler\ForTokenHandler::class,
\Phug\Lexer\Token\IdToken::class => \Phug\Parser\TokenHandler\IdTokenHandler::class,
\Phug\Lexer\Token\InterpolationStartToken::class => \Phug\Parser\TokenHandler\InterpolationStartTokenHandler::class,
\Phug\Lexer\Token\InterpolationEndToken::class => \Phug\Parser\TokenHandler\InterpolationEndTokenHandler::class,
\Phug\Lexer\Token\ImportToken::class => \Phug\Parser\TokenHandler\ImportTokenHandler::class,
\Phug\Lexer\Token\IndentToken::class => \Phug\Parser\TokenHandler\IndentTokenHandler::class,
\Phug\Lexer\Token\MixinCallToken::class => \Phug\Parser\TokenHandler\MixinCallTokenHandler::class,
\Phug\Lexer\Token\MixinToken::class => \Phug\Parser\TokenHandler\MixinTokenHandler::class,
\Phug\Lexer\Token\NewLineToken::class => \Phug\Parser\TokenHandler\NewLineTokenHandler::class,
\Phug\Lexer\Token\OutdentToken::class => \Phug\Parser\TokenHandler\OutdentTokenHandler::class,
\Phug\Lexer\Token\TagInterpolationStartToken::class => \Phug\Parser\TokenHandler\TagInterpolationStartTokenHandler::class,
\Phug\Lexer\Token\TagInterpolationEndToken::class => \Phug\Parser\TokenHandler\TagInterpolationEndTokenHandler::class,
\Phug\Lexer\Token\KeywordToken::class => \Phug\Parser\TokenHandler\KeywordTokenHandler::class,
\Phug\Lexer\Token\TagToken::class => \Phug\Parser\TokenHandler\TagTokenHandler::class,
\Phug\Lexer\Token\TextToken::class => \Phug\Parser\TokenHandler\TextTokenHandler::class,
\Phug\Lexer\Token\VariableToken::class => \Phug\Parser\TokenHandler\VariableTokenHandler::class,
\Phug\Lexer\Token\WhenToken::class => \Phug\Parser\TokenHandler\WhenTokenHandler::class,
\Phug\Lexer\Token\WhileToken::class => \Phug\Parser\TokenHandler\WhileTokenHandler::class,
]
scanners array
Allow to change how to scan and detect each string sequence to get the given token, the default map is:
[
'new_line' => \Phug\Lexer\Scanner\NewLineScanner::class,
'indent' => \Phug\Lexer\Scanner\IndentationScanner::class,
'import' => \Phug\Lexer\Scanner\ImportScanner::class,
'block' => \Phug\Lexer\Scanner\BlockScanner::class,
'yield' => \Phug\Lexer\Scanner\YieldScanner::class,
'conditional' => \Phug\Lexer\Scanner\ConditionalScanner::class,
'each' => \Phug\Lexer\Scanner\EachScanner::class,
'case' => \Phug\Lexer\Scanner\CaseScanner::class,
'when' => \Phug\Lexer\Scanner\WhenScanner::class,
'do' => \Phug\Lexer\Scanner\DoScanner::class,
'while' => \Phug\Lexer\Scanner\WhileScanner::class,
'for' => \Phug\Lexer\Scanner\ForScanner::class,
'mixin' => \Phug\Lexer\Scanner\MixinScanner::class,
'mixin_call' => \Phug\Lexer\Scanner\MixinCallScanner::class,
'doctype' => \Phug\Lexer\Scanner\DoctypeScanner::class,
'keyword' => \Phug\Lexer\Scanner\KeywordScanner::class,
'tag' => \Phug\Lexer\Scanner\TagScanner::class,
'class' => \Phug\Lexer\Scanner\ClassScanner::class,
'id' => \Phug\Lexer\Scanner\IdScanner::class,
'attribute' => \Phug\Lexer\Scanner\AttributeScanner::class,
'assignment' => \Phug\Lexer\Scanner\AssignmentScanner::class,
'variable' => \Phug\Lexer\Scanner\VariableScanner::class,
'comment' => \Phug\Lexer\Scanner\CommentScanner::class,
'filter' => \Phug\Lexer\Scanner\FilterScanner::class,
'expression' => \Phug\Lexer\Scanner\ExpressionScanner::class,
'code' => \Phug\Lexer\Scanner\CodeScanner::class,
'markup' => \Phug\Lexer\Scanner\MarkupScanner::class,
'expansion' => \Phug\Lexer\Scanner\ExpansionScanner::class,
'dynamic_tag' => \Phug\Lexer\Scanner\DynamicTagScanner::class,
'text_block' => \Phug\Lexer\Scanner\TextBlockScanner::class,
'text_line' => \Phug\Lexer\Scanner\TextLineScanner::class,
]
assignment_handlers array
Allow to change how to handle assignments and allow to create your owns, example:
Phug::display('img&foo()', [], [
'assignment_handlers' => [
function (AssignmentElement $assignment) {
if ($assignment->getName() === 'foo') {
$assignment->detach();
yield new AttributeElement('data-foo', '123');
}
},
],
]);
Output:
<img data-foo="123" />
attribute_assignments array
Allow to change how to handle attributes, example:
Phug::display('img&attributes(["foo" => "bar", "biz" => true])', [], [
'attribute_assignments' => [
'foo' => function () {
return 'not-bar';
},
],
]);
Output:
<img foo="not-bar" biz="biz" />
attribute_precedence "assignment" (default value), "attribute", "left", "right", callable
Allow to customize precedence between attributes and &attribute assignment.
Phug::display('
| Last assignment
- $data = ["href" => "/c"]
a(href="/a")&attributes(["href" => "/b"])&attributes($data)(href="/d")
', [], [
'attribute_precedence' => 'assignment',
]);
Phug::display('
| Last attribute
- $data = ["href" => "/c"]
a(href="/a")&attributes(["href" => "/b"])&attributes($data)(href="/d")
', [], [
'attribute_precedence' => 'attribute',
]);
Phug::display('
| First token (either it’s attribute or assignment)
- $data = ["href" => "/c"]
a(href="/a")&attributes(["href" => "/b"])&attributes($data)(href="/d")
', [], [
'attribute_precedence' => 'left',
]);
Phug::display('
| Last token (either it’s attribute or assignment)
- $data = ["href" => "/c"]
a(href="/a")&attributes(["href" => "/b"])&attributes($data)(href="/d")
', [], [
'attribute_precedence' => 'right',
]);
Phug::display('
| First assignment
- $data = ["href" => "/c"]
a(href="/a")&attributes(["href" => "/b"])&attributes($data)(href="/d")
', [], [
'attribute_precedence' => static function (array $assignments, array $attributes) {
// Sort in reverse-order (right-most tokens to left-most tokens)
usort($assignments, static function (\Phug\Util\OrderedValue $a, \Phug\Util\OrderedValue $b) {
return $b->getOrder() - $a->getOrder();
});
usort($attributes, static function (\Phug\Util\OrderedValue $a, \Phug\Util\OrderedValue $b) {
return $b->getOrder() - $a->getOrder();
});
// Return order in which values will merge
// So from lowest to highest precedence
return array_merge($attributes, $assignments);
},
]);
Phug::display('
| First attribute
- $data = ["href" => "/c"]
a(href="/a")&attributes(["href" => "/b"])&attributes($data)(href="/d")
', [], [
'attribute_precedence' => static function (array $assignments, array $attributes) {
// Sort in reverse-order (right-most tokens to left-most tokens)
usort($assignments, static function (\Phug\Util\OrderedValue $a, \Phug\Util\OrderedValue $b) {
return $b->getOrder() - $a->getOrder();
});
usort($attributes, static function (\Phug\Util\OrderedValue $a, \Phug\Util\OrderedValue $b) {
return $b->getOrder() - $a->getOrder();
});
// Return order in which values will merge
// So from lowest to highest precedence
return array_merge($assignments, $attributes);
},
]);
Output:
Last assignment
<a href="/c"></a>
Last attribute
<a href="/d"></a>
First token (either it’s attribute or assignment)
<a href="/a"></a>
Last token (either it’s attribute or assignment)
<a href="/d"></a>
First assignment
<a href="/b"></a>
First attribute
<a href="/a"></a>
CLI
Phug and Pug-php can be run as CLI commands:
./vendor/bin/phug render 'p=$msg' '{"msg": "Hello"}'
./vendor/bin/pug render 'p=msg' '{"msg": "Hello"}'
./vendor/bin/pug is available only if you installed Pug-php,
./vendor/bin/phug is always available if you use any of both.
Globals options
2 globals options are available for all commands:
--output-file (or -o) redirect success output to the specified
file, it allow for example to write rendered HTML in a file:
./vendor/bin/phug render-file my-source-file.pug --output-file my-destination-file.html
--bottstrap (or -b) allow you to include a PHP file to be
executed before the command. For example you can define your
variables in a dynamic way:
Let say you have the following file: set-variables.php
Phug::share([
'time' => date('H:i'),
]);
./vendor/bin/phug render 'p=$time' -b set-variables.php -o page.html
page.html will contains a paragraph with the time
inside (example <p>17:47</p>).
The bootstrap file can run any PHP code and have all classes available thanks to composer autoload.
If a file is named phugBootstrap.php in the current directory,
then it will be used as default bootstrap file.
Both options above can be set using space delimiter or equal operator, so all the following are equivalent:
./vendor/bin/phug render-file a.pug --output-file a.html
./vendor/bin/phug render-file a.pug --output-file=a.html
./vendor/bin/phug render-file a.pug -o a.html
./vendor/bin/phug render-file a.pug -o=a.html
Commands
Commands are the same for both phug and pug and will
call the same methods. The lonely difference is phug call
them on the Phug facade (that use Phug\Renderer with no
particular extensions and settings) and
pug call them on the Pug\Facade facade (that use
Pug\Pug that comes with js-phpize and the pug-php
default settings). For both, you can use --bootstrap
to set more options, add extensions, share variables, etc.
render (or display)
Call ::render() and take 1 required argument pug code input
(as string), and 2 optional arguments: local variables (as
JSON string) and options (as JSON string)
./vendor/bin/phug render 'p(foo="a")' '{}' '{"attributes_mapping":{"foo":"bar"}}'
Will output:
<p bar="a"></p>
render-file (or display-file)
Call ::renderFile(), it's exactly like render expect it
take a file path as first argument:
./vendor/bin/phug render-file /directory/file.pug '{"myVar":"value"}' '{"self":true}'
render-directory (or display-directory)
Call ::renderDirectory(), render each file in a directory and its subdirectories.
It take 1 required argument: the input directory, and 3
optional arguments:
- the output directory (if not specified, input directory is used instead, so rendered file are generated side-by-side with input files)
- output files extension (
.htmlby default) - local variables (as JSON string)
./vendor/bin/phug render-directory ./templates ./pages '.xml' '{"foo":"bar"}'
Supposing you have the following ./templates directory:
templates
some-view.pug
some-subdirectory
another-view.pug
You will get the following .pages:
pages
some-view.xml
some-subdirectory
another-view.xml
And in this example, all rendered files will get $foo = "bar" as
available local.
compile
Call ::compile(). Compile a pug string without render it. It
take 1 required argument: the pug code and 1 optional: the
filename (can also be provided via options), it will be used
to resolve relative imports.
./vendor/bin/phug compile 'a(href=$link) Go' 'filename.pug' -o file.php
This will write something like this in file.php:
<a href="<?= htmlspecialchars($link) ?>">Go</a>
compile-file
Call ::compileFile(). Compile a pug input file without
render it.
./vendor/bin/phug compile-file views/index.pug -o public/index.php
compile-directory (or cache-directory)
Call ::cacheDirectory() (via ::textualCacheDirectory()).
Compile each file in a directory and its subdirectories.
It's the perfect way to cache all your pug files when you deploy an new version of your application in a server in production.
If you call this command each time you put something new in
production, you can disable the up-to-date check with the
option 'up_to_date_check' => false to optimize performance.
./vendor/bin/phug compile-directory views cache '{"option":"value"}'
Only the first argument is required (input directory where are stored your pug files).
As a second optional argument, you can specify the cache directory,
else cache_dir specified in options will be used, if not
specified, system temporary directory will be used.
The third argument (optional too) allows you to pass options as a JSON string if needed.
custom commands
You can create your own commands thanks to the commands option:
For example if you write this in a phugBootstrap.php
file (in the directory you enter your commands, typically
at the project root) or in any other file that you load
with the CLI option --bootstrap:
<?php
Phug::setOption('commands', [
'renderDate' => function () {
return Phug::render('p=date("d/m/Y")');
},
]);
Then you will be able to execute the following command:
./vendor/bin/phug render-date
And it will display the date in a paragraph:
<p>09/02/2018</p>
The commands option must be an array listing custom commands, each command can be described with one of the 3 ways below:
<?php
Phug::setOption('commands', [
'cacheFile',
// Make the Phug::cacheFile() method
// available as its kebab case name:
// ./vendor/bin/phug cache-file
'storeFile' => 'cacheFile',
// Make the Phug::cacheFile() method
// with an other name:
// ./vendor/bin/phug store-file
'myFunction' => function () {
return 'Hello';
},
// Execute the function with the given
// name:
// ./vendor/bin/phug my-function
]);
The command can also call a macro.
Watch changes and autocompile
To use the watch command, you will need to
install phug/watcher:
composer require phug/watcher
And you can use the --init command to create a
phugBoostrap.php file used as default bootstrap
file by the phug CLI.
./vendor/bin/watcher --init
In this file, you can change the list of the directories to watch (./views and ./templates by default) and you can change the cache path (by default, it creates a phug-cache in your system temporary storage directory).
Then this file enable the watcher extension and set Phug options.
To properly work, you need to use here the same options as in you application. To keep them synchronized you can use a common config file.
For example, let say you have the following structure for you app:
- vendor
- config
- phug.php
- bootstrap
- cli.php
- web.php
- views
- home.pug
- cache
- views
composer.json
index.php
Then you can have the following contents:
phug.php
<?php return [
'cache_dir' => __DIR__.'/../cache/views',
'paths' => [
__DIR__.'/../views',
],
// Any other option you use in you app:
'debug' => true,
];
cli.php
<?php
$options = include __DIR__.'/../config/phug.php';
if (!file_exists($options['cache_dir']) && !@mkdir($options['cache_dir'], 0777, true)) {
throw new \RuntimeException(
$options['cache_dir'].' cache directory could not be created.'
);
}
Phug::addExtension(\Phug\WatcherExtension::class);
Phug::setOptions($options);
web.php
<?php
include_once __DIR__.'/../vendor/autolod.php';
$options = include __DIR__.'/../config/phug.php';
Phug::setOptions($options);
index.php
<?php
include_once __DIR__.'/bootstrap/web.php';
Phug::displayFile('home');
And you can run the watcher with:
./vendor/bin/phug watch -b bootstrap/cli.php
When you will edit any file in the views directory and save it, it will automatically refresh the cache (as long as the command is running).
If you CLI bootstrap has the default location (phugBootstrap.php), you can simply do:
./vendor/bin/phug watch
Automatically reload the browser on change
Browser auto-reloading also need the phug/watcher package
to be installed (see above).
It allows you to start a development server and a watcher in parallel on 2 different ports with the following command:
./vendor/bin/phug listen 9000 index.php
It will start a dev server as if you did:
php -S localhost:9000 index.php
Supposing you load the \Phug\WatcherExtension in index.php,
it will add a <script> tag in the rendering to watch changes and
refresh the page when they happen (communicating on a second
port, by default 8066).
For example if you did some basic watcher install:
composer require phug/watcher
./vendor/bin/watcher --init
And have the following index.php:
<?php
include_once __DIR__ . '/vendor/autoload.php';
include_once __DIR__ . '/phugBootstrap.php';
Phug::displayFile('views/basic.pug');
Then by runing ./vendor/bin/phug listen 9000 index.php, you
will be able to load http://localhost:9000 in a browser and the
page will auto-refresh if you change the views directory.
Unit tests and coverage
You can try out our experimental testing CLI tool using PHPUnit and xdebug including Pug files coverage reports and all-in-one PHP and Pug unit tests helpers:
Frequently asked questions
Why do I get error with UPPER_CASE variables?
This can happen when you use use JS-style (js-phpize module or Pug-php) simply because nothing in the JS syntax allow to distinguish a constant from a variable so we chose to follow the most used convention: a all-upper-case name is a constant, everything else is a variable:
:php
$fooBar = 9;
define('FOO_BAR', 8);
$d = 9;
define('D', 8);
$_ = '_';
define('_K', 5);
p=fooBar
p=FOO_BAR
p=d
p=D
p=_
p=_K
Is it still possible to disable constants this way:
<?php
use Pug\Pug;
include 'vendor/autoload.php';
$pug = new Pug([
'module_options' => [
'jsphpize' => [
'disableConstants' => true,
],
],
]);
$pug->display('p=FOO', [
'FOO' => 'variable',
]);
How to use namespaces in a pug template?
By default, templates are executed with no namespace and so you need to write full paths to access functions and classes:
p=\SomeWhere\somefunction()
p=call_from_root_namespace()
- $a = new \SomeWhere\SomeClass()
You cannot set a namespace at the beginning of a pug template as it is not the beginning of the PHP compiled file (we prepend debug stuff, dependencies, mixins functions, etc.)
However you can apply globally a namespace to all templates this way:
Phug::setOption('on_output', function (OutputEvent $event) {
$event->prependCode('namespace SomeWhere;');
});
With this output event interceptor, the previous code become:
p=somefunction()
p=\call_from_root_namespace()
- $a = new SomeClass()
How to run JS scripts inside templates?
There are different possible approaches:
First of all, avoid mixing PHP and JS in your back-end so if you already have a PHP app and find some node.js package you would use, check there is no equivalent in PHP.
If you don't need to call PHP functions/methods/objects in your templates, then you can use the native npm pugjs package. Pug-php have a wrapper for that:
<?php
use Pug\Pug;
include 'vendor/autoload.php';
$pug = new Pug([
'pugjs' => true,
]);
// Phug engine skipped, pugjs used instead
$pug->display('p=9..toString()');
// So this way, you can `require` any JS file or npm package:
$pug->display('
- moment = require("moment")
p=moment("20111031", "YYYYMMDD").fromNow()
');
- You can pass a helper function as any other variable via
shareorrenderthat can call a CLI program (so node or anything else):
$pug->share('dateDisplay', function ($date) {
return shell_exec('node your-js-script.js ' . escapeshellarg($date));
});
- You can use the V8Js engine (http://php.net/manual/en/book.v8js.php):
$pug->share('dateDisplay', function ($date) {
$v8 = new V8Js('values', array('date' => '2016-05-09'));
return $v8->executeString('callJsFunction(values.date)');
});
How to use helper functions with pugjs engine?
When you use Pug-php with pugjs option to true all
the data you pass to the view is encoded as JSON. So you loose
your class typing and you loose closures functions.
Nevertheless, you can write JS functions inside you templates and use any local or shared variable in it :
-
function asset(file) {
return assetDirectory + '/' + file + '?v' + version;
}
script(href=asset('app'))
[
'assetDirectory' => 'assets',
'version' => '2.3.4',
]
How to disable errors on production?
In production, you should set the debug option to false.
Then you should have a global exception handler for your PHP
application to hide errors from the user.
Best practice would be to log them (in a file for example) using exception handler (see set_exception_handler).
A more radical way is to hide them completely with
error_reporting(0); or the same setting in php.ini.
How to includes files dynamically?
The include and extend statements only allow static paths:
include myFile but disallow dynamic imports such as:
include $myVariable.
But custom keyword come to the rescue:
Phug::addKeyword('dyninclude', function ($args) {
return array(
'beginPhp' => 'echo file_get_contents(' . $args . ');',
);
});
This allow to include files as raw text:
- $styleFile = 'foo.css'
- $scriptFile = 'foo.js'
style
// Include foo.css as inline content
dyninclude $styleFile
script
// Include foo.js as inline content
dyninclude $scriptFile
Warning: you must be sure of the variables content. If
$styleFile contains "../../config.php" and if config.php
contains some DB passwords, session secret, etc. it will
disclose those private information.
You must be even more prudent if you allow to include PHP files:
Phug::addKeyword('phpinclude', function ($args) {
return array(
'beginPhp' => 'include ' . $args . ';',
);
});
It can be helpful and safe, for example if you do:
each $module in $userModules
- $module = 'modules/'.preg_replace('/[^a-zA-Z0-9_-]/', '', $module).'.php'
phpinclude $module
In this example, by removing all characters except letters,
digits and dashes, no matter what contains $userModules
and where it come from, you're sure it can only include
an existing file from the directory modules. So you
just have to check what you put in this directory.
Finally you can also include files dynamically and render them with Phug (or any transformer):
Phug::addKeyword('puginclude', function ($args) {
return array(
'beginPhp' => 'Phug::display((' . $args . ') . ".pug");',
);
});
- $path = '../dossier/template'
puginclude $path
It includes ../directory/template.pug as we concat
the extension in the keyword callback.
How to handle internationalization?
Translations functions such as __() in Laravel or
_() with gettext can be called as any other function
in expressions and codes.
The gettext parser does not support pug files but the python mode give pretty good results with pug files.
Init method such as textdomain can be called in a simple
code block: - textdomain("domain") for example as
your first file line.
Last, be sure all needed extension (such as gettext) is well installed on the PHP instance that render your pug files.
How to clear the cache?
If you use laravel-pug
the cache is handled by Laralve and so you can refer to the
framework documentation for cache operations. Empty it
for example can be done with php artisan cache:clear
Else in production, you should use the
cache-directory command
and disable up_to_date_check option.
In development environment, if you have any trouble with the cache, you can just safely disable cache with some code like this:
Phug::setOption('cache', $prod ? 'cache/directory' : false);
What is the equivalent of Twig filter?
If you know Twig, you may know this syntax:
<div>{{ param1 | filter(param2, param3) }}</div>
Or if you know AngularJS, those filters:
<div>{{ param1 | filter : param2 : param3 }}</div>
Pug filters are a bit different since there are allowed only outside expressions:
div
:filter(param2=param2 param3=param3)
param1
Inside tag content, it's technically usable even if this syntax would not be so relevant in this case.
For attributes values or inside mixin arguments, there is no such thing like filters available because simple functions works just fine:
<div>{{ filter(param1, param2, param3) }}</div>
Twig/AngularJS filters are nothing more than a first argument-function name swap. Most of Twig filters are available as native PHP functions (split: explode, replace: strtr, nl2br: nl2br, etc.).
Moreover, you can pass functions as closures inside your locals or the shared variables.
And remember the | yet exists in PHP, it's the
OR bitwise operator.
How to solve Warning: include() read X bytes more data than requested (Y read, Z max)?
This happens probably because you have the
php.ini mbstring.func_overload settings
with the 2 flag on.
As it's an obsolete setting, the best thing
to do is to set it to 0 and replace manually
functions in your app rather than overload them.
If you really need to keep this setting, you can still use the FileAdapter that will not have this problem:
Phug::setOption('adapter_class_name', FileAdapter::class);
How to solve Maximum function nesting level of 'X' reached?
This error means you overhead the xdebug.max_nesting_level
php.ini setting. The default value is 100 and it might
be not enough. With many includes and nested mixins
call in your pug template, you could reach 500 nesting
level. So first, try to increase this setting.
If you still get this error, then you probably
have an infinite recursion. It can happen in pug when
a template a.pug include b.pug then b.pug
include a.pug or directly a.pug including
a.pug (obviously the same goes for PHP
files). If you do not have conditions to avoid the
recursion to be infinite, you will get a nesting level
error, or a timeout exceeded. It can also happen
when a mixin calls it self (or indirectly via
other mixins) or the same with PHP functions.
Note: xdebug is a debug extension, so don't forget to disable it in production.
Should I use render or renderFile?
In old versions of Pug-php, only was the render method that
rendered a file if the given argument matched an existing file,
else it rendered as pug string. While Tale-pug always rendered
a file.
None of these behaviour was consistent with Pugjs so we chose
to change it in Phug. With Phug, render only take
strings, no file, and renderFile has been added to render
files.
Pug-php keep the old behaviour for the moment to ease the
upgrade but you're strongly encouraged to use the strict option
to get the new behaviour:
$pug = new Pug([
'strict' => true,
]);
This way $pug->render() will always take first argument as
a pug string no matter it mach a file path or not. This can
avoid some unexpected behaviors.
If for some backward compatibility reason, you can't use this
option, then you should avoid using render and use
renderString for a pug string and renderFile for a
file.
How to debug a code from the documentation not working in my app?
First, we assume you use the last version of Phug (or Pug-php >= 3).
You can check your Phug version with
composer show phug/phug
and update it with:
composer update
Last Phug stable version is
If you're using a version < 3.0 of Pug-php
(check it with composer show phug/phug)
this documentation is not accurate for your and
you're strongly encouraged to upgrade to Pug-php
If you're using Tale-jade or Tale-pug, you're advised to migrate to Phug.
Then, examples in this documentation are for Phug if not specified otherwise. If you're using Pug-php you have to adapt it. For example:
Phug::setOption('cache_dir', 'directory');
Phug::display('template.pug', $vars);
Should have to be written as one of these 2 syntaxes to get Pug-php features working:
\Pug\Facade::setOption('cache_dir', 'directory');
\Pug\Facade::display('template.pug', $vars);
\Pug\Facade allow to replace easily Phug
keeping the same syntax. But you could prefer
the instance syntax:
$pug = new Pug([
'cache_dir' => 'directory',
]);
$pug->display('template.pug', $vars);
Alternatives
It exists alternative ways to get pug templates with a PHP back-end.
V8Js
http://php.net/manual/fr/book.v8js.php
You can run the V8 engine from PHP. You might need to use the
setModuleLoader to require the pug node module and its
dependencies in an automated way.
Then you could require the native pug engine with executeString
and call pug using PHP data. That could be a very fast way to
get the exact pugjs behavior with PHP data.
As far as we know, no such wrapper out-of-the-box yet exists. If you made or know one, please use the button [Edit] to submit a pull-request.
Pug-php with pugjs option
When you install Pug-php, you will be asked for installing
pug-cli node package. If you enter Y, it will use npm
if available on the machine to install the official pug-cli
package, and Pug-php has an option to use it instead of
its own engine:
<?php
include 'vendor/autoload.php';
$pug = new Pug([
'pugjs' => true,
]);
$html = $pug->render('p=9..toString()');
Here you call the native pug package using directly node.js, that's why you can use any JS syntax.
If you do this, be aware we are not responsible of what happens inside templates, it's no longer PHP used and the documentation to refer to is https://pugjs.org
Optionally, you can specify the path to the node and pug-cli programs with following tools:
$pug = new Pug([
'pugjs' => true,
'nodePath' => __DIR__ . '/../bin/node',
]);
NodejsPhpFallback::setModulePath('pug-cli', __DIR__ . '/../node_modules/pug-cli');
Resources
List of custom filters compatible with Phug: http://pug-filters.selfbuild.fr/
List of Phug ecosystem projects: https://gist.github.com/kylekatarnls/8720155b06b016f8128ff511b8695532
Source code of this website: https://github.com/phug-php/website